Showing posts with label jacket. Show all posts

Sunday, December 17, 2023

Jackets need pockets! Use the selvedge for a clever detail

Need pockets? You bet! Pants, jackets, skirts, shorts... they all need pockets. If these wardrobe pieces don't have them, they get added.

Make Nine cotton/linen jacket with a patch pocket

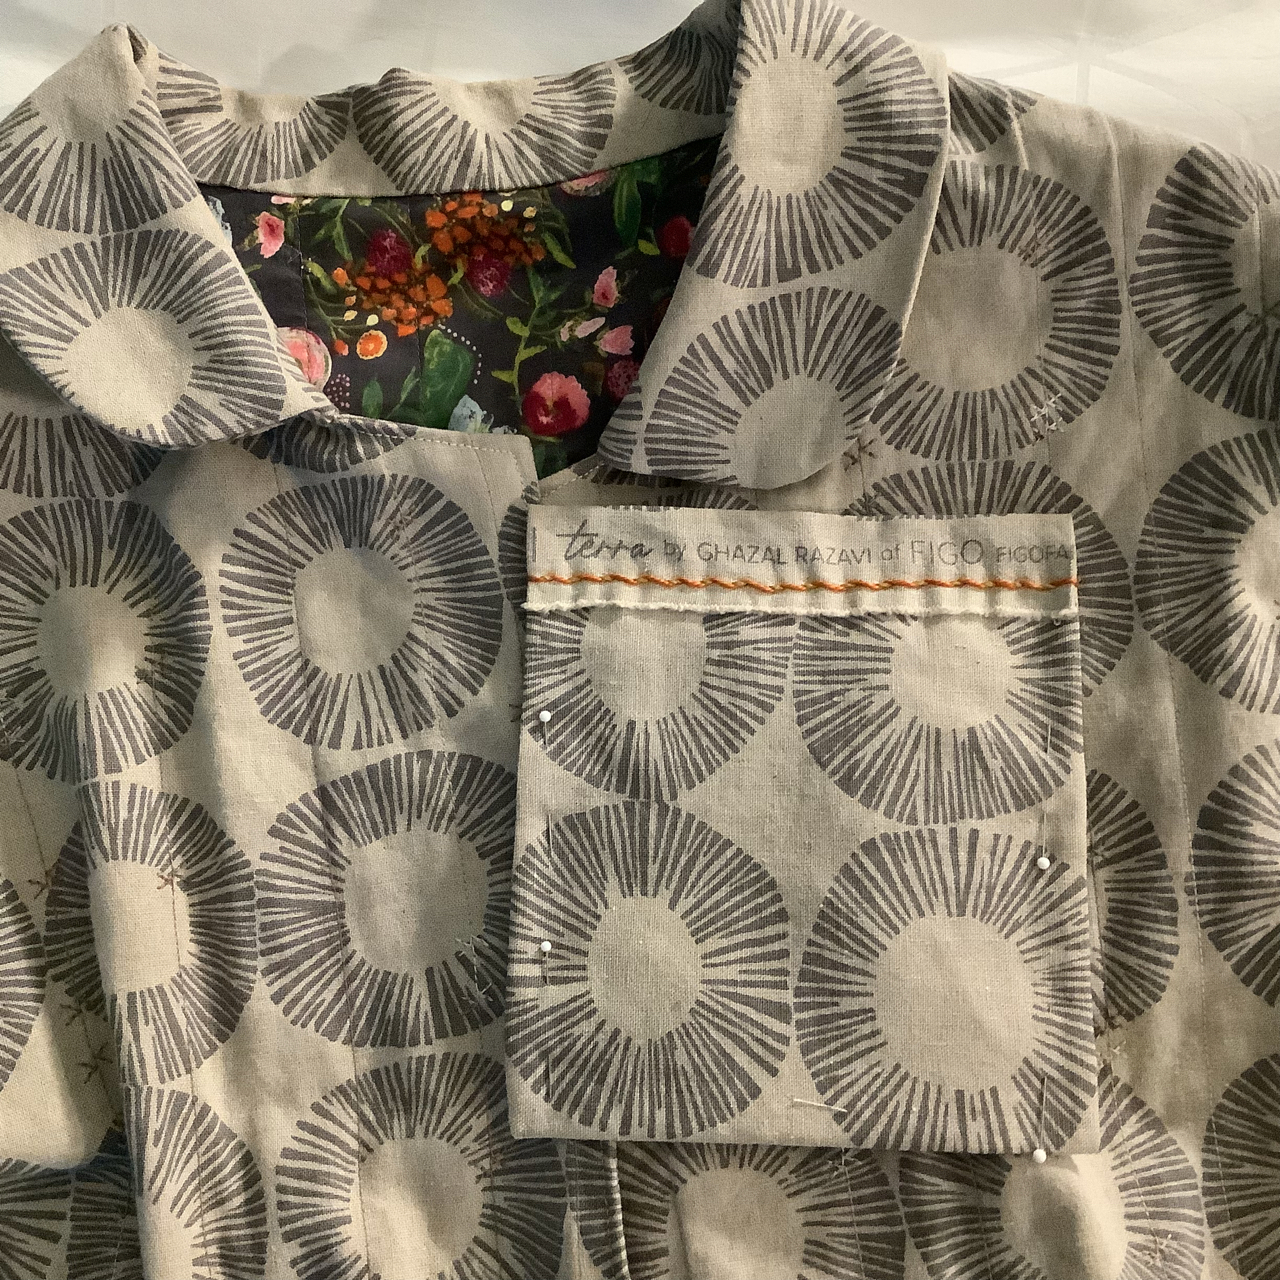
This cotton/linen jacket is one of my Make Nine 2023 projects. It was finished just in the nick-o'-time to wear at a business conference at the end of October, but I didn't have time to add a pocket.

Incorporate an interesting selvedge on your pocket

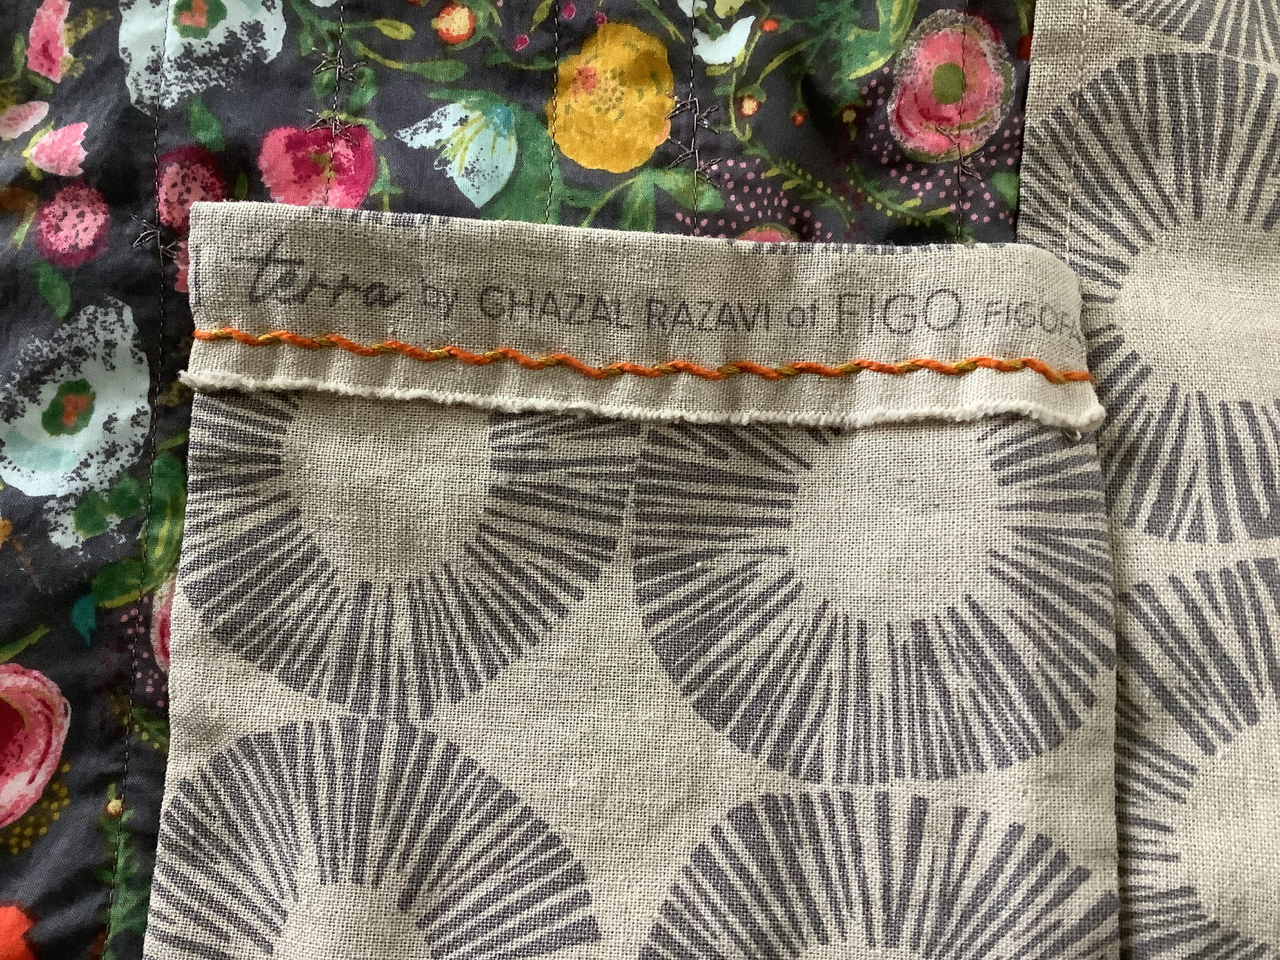
Fabric selvedges these days are decorative as well as functional and informative. Many printed fabrics—especially in the quilting industry—have information such as the fabric collection and designer's names printed on the selvedge in addition to the classic "color dot" registration marks. The typefaces used often reflect the theme or aesthetic of the printed design, as well.

Closeup of information on the selvedge.

For this patch pocket, I used an offcut piece of the fabric from the jacket. It was serendipitous that this scrap had a selvedge and the printing—the fabric line and designer name—on it. 

Trimming the scrap into a long rectangle, I folded it nearly in half, sewed the sides, turned it to the right side, and flipped the selvedge edge over at the top of the pocket. The hand embroidery secured the flap to the body of the pocket and the perle cotton thread color echoed the colors of the jacket lining. 

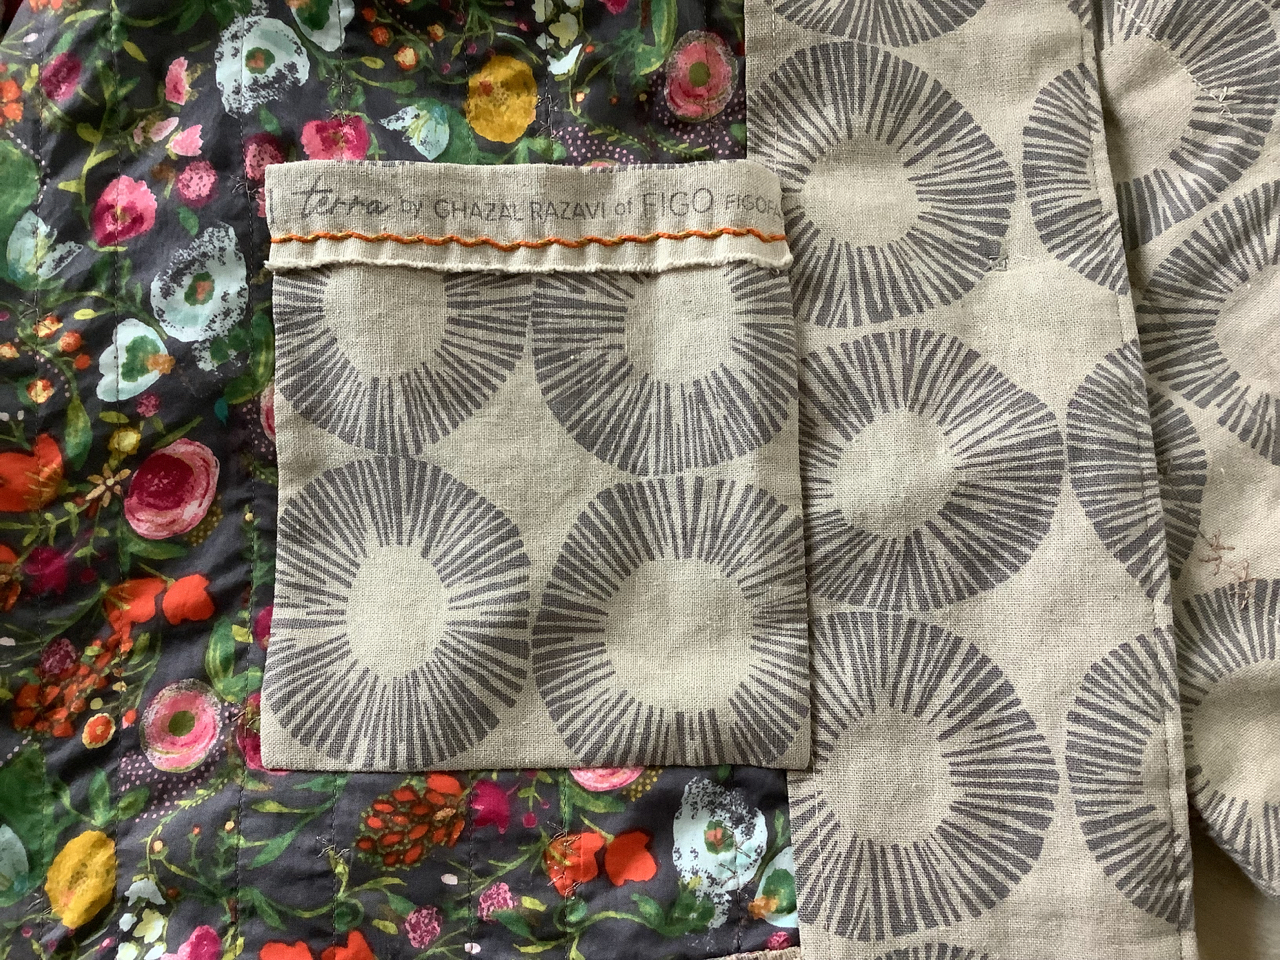
A few weeks ago, the pocket came on the road to West Virginia with me as my "hand work" project. It's now [hand] sewn on the jacket's inside.

Patch pocket attached by hand to the inside of the jacket.

Even though the pocket can't be seen on the outside, it has fun details!


Sunday, September 19, 2021

The Tablecloth Jacket: the epitome of repurposing

One of the September Textile Love 2021 prompts, "Repurpose," reminded me of a jacket I made in a 2015 workshop with Angelika Werth. The workshop was called Garments: Deconstruction / Reconstruction. And this piece is the epitome of repurposing!

The Tablecloth Jacket, from a 2015 workshop with Angelika Werth.

If you hadn't read the title of this blog post, would you have known this jacket was created from a large, oval tablecloth and a pair of embroidered capri pants? I bet not. But it was!

The Tablecloth Jacket, back view.

Inside/Outside

Oh, I wish I had a photo of the tablecloth before it was "repurposed." A photo would make this easier to describe. Anyway...

During a show-and-tell session during the workshop, my classmates suggested I use the "wrong side" of the tablecloth—the faded denim side—for the outside of the jacket. The dark blue inside of the jacket was actually the "right side" of the tablecloth. Don't ask how many times I "unstitched" a seam by adhering to the sewing adage of "with right sides together..."! In this project, the "right side" was not necessarily always the right side.

The "wrong side" of the tablecloth is the outside of the jacket.
The design in the darker blue is actually the "right side" of the tablecloth.


Capri pants = jacket sleeves

The next "repurposed" element was an embroidered pair of capri pants. The pants were deconstructed and turned into the jacket's sleeves. The color of the pants as well as the floral embroidery were a perfect complement to the tablecloth!

Decorative embroidery on the capri pants.

The vent at the lower edge was a delightful "bonus" detail! 

The deconstructed pants turned into the jacket sleeves.


Jacket details

Looking at the back of the jacket, note the decorative braid-like pattern up the center back. The braid pattern was made from two rope designs that were running lengthwise at the 1/3 and 2/3 points of the tablecloth. The center section of the tablecloth had no design. I cut the center away and pieced the ropes to run up the center back—making it a braid.

Center back braid design and hand stitching at the shoulder seams.

Below is the inside of the jacket showing the center back. The raw edges of seam allowances at the center back are covered with a silk bias strip (cut from a silk blouse/dress). The little bows are a sweet detail and the color was perfect.

Bias trim covers the center back seam allowances.

The armhole raw edges and side seams are also covered with a silk bias strip.

Other construction details as well as serendipitous design elements include an open "gusset" at the underarm. You would only notice this if the arm was lifted... and you knew to look.

Underarm open gusset.

The pant leg sleeves were attached to the bodice with decorative stitching.

Open underarm and hand stitched seam.

The floral filigree design on front lapels is asymmetrical. One lapel is pieced on the diagonal.

Asymmetrical designs on the jacket lapels.

The lapels actually use the "right side" of the tablecloth—the darker blue—as the "right side" of the lapel. It makes a nice contrast and creates a long vertical line in the garment.

The dark blue lapel is a nice contrast to the bodice and sleeves.
It visually creates a long vertical line on the body.

I can't believe how the capri pant legs were the perfect length for the sleeves!

Capri pants = jacket sleeves! The perfect sleeve length.

Resources

The pattern I used as a basis for the body was the Santa Cruz Jacket/Vest pattern from the ReVisions collection by Diane Ericson. I did make a muslin for fit before cutting into the tablecloth.

The tablecloth and capri pants were acquired at a local resale shop. The silk bias strips were created from a silk dress that one of the class participants did not want.

My deconstructed/reconstructed Tablecloth Jacket, completed in 2015.

So, there you have it! My deconstructed/reconstructed Tablecloth Jacket. Simply serendipitous and totally repurposed!

Angelika Werth was a generous instructor with a wealth of knowledge and experience. My classmates were encouraging and supportive. It was a success all around!


Sunday, December 27, 2020

Kalamkari Jacket: my last Make Nine 2020 finish

The last Make Nine 2020 project squeaked in with four days to spare in this Make Nine year. This is my kalamkari jacket.

Kalamkari Jacket. Hand stamped with vegetable dyes on cotton fabric.
Fabric from Diamond Textiles.

I have been savoring this kalamkari yardage from Diamond Textiles for some time, so included it in my Make Nine list for this year. My appreciation of the kalamkari technique deepened after taking a virtual workshop through Selvedge magazine this year. 

In the photo below, the individual block print designs can be seen. Each block is stamped by hand and is skillfully registered with the each image across the fabric. 
Kalamkari jacket, front view.

Matching the designs
Because the pattern in this fabric is prominent, it took extra time and thought when laying out the pattern pieces for the jacket. The design needed to line up across the front as well as at the side seams. (There were also a few re-sews at the top and hemline to make the pattern match.)
Kalamkari jacket front.

Kalamkari jacket back.

The collar pieces were also cut with the print design in mind. Here is a back view of the collar. 
Kalamkari jacket back collar view.

Hand finishing
I do enjoy the hand work involved with garment making. For my "quilted" jackets, I leave about an inch of the lining extending out at the fronts and back side seams to cover the raw seam allowances once the side seams are sewn. 
When cutting out the pattern pieces, the lining extends out at the side seams.

After the pieces are sewn, the lining is lapped over the raw seam allowances and hand stitched down. This is done on the side seams and the sleeves.
Enclosing raw seam allowances of the sleeves.

At the shoulder seams, I insert a binding strip.
A 2.5" strip of lining fabric is cut for binding the shoulder seams.

The binding strip is hand sewn over the raw seam allowances after the seam is sewn.
Hand stitching the shoulder seam bindings.

A bias strip covers the raw edges at the sleeve hems. Sometimes I use a contrasting fabric for this detail—to make it show. However, I opted not to introduce another (commercial) fabric into this garment.
Bias binding at the sleeve cuffs.

The button loops are of the same kalamkari fabric and the buttons are sewn on by hand. 
Buttons and corresponding button loop closures.

The inside collar, front facings and bottom hem are sewn by hand.
Jacket lining.

The fussier aspects in the making of this jacket were worth the extra time and effort. Don't ya think?
Kalamkari Jacket. Make Nine 2020 finish.

That's it for Make Nine 2020! 
I checked all the boxes... and colored in all the worksheet diagrams.

My Make Nine worksheet for 2020. All items complete.

Here is the 2020 recap:

My Make Nine completed projects for 2020.

Make Nine 2021
I've been contemplating and planning for Make Nine 2021. I will be taking the Challenge again next year. Here is a link with more details, helpful hints on choosing your list and a printable worksheet. Anyone else want to join me?

Saturday, November 4, 2017

Primitive Stars, ikat and slow stitiching a new jacket

Primitive Stars, ikat jacket (back view).
A jacket—particularly one with a minimal number of seams and pattern pieces—presents a vacant canvas for creative stitching, surface design, and experimenting with patchwork. For fiber artists and garment makers, what better reason is there for pulling out favorite fabrics, threads and treasured scraps and making one?

For my two previous jackets (see this blog post and the photo collage in this post), I used yarn-dyed wovens. These textiles are from Diamond Textiles [don't be fooled by the thinner, copycats] and I am still captivated by the rich, textured designs and the way the threads and stitches present themselves on these fabrics.

My recent jacket finish—just in time for Fall Quilt Market, I might add—combines one of Diamond Textiles' ikats, the blue-grey colorway from the Primitive Stars collection, and a few scraps of yarn-dyed and commercial print fabrics.

Three layers
As with most of my quilted wearables, there are three layers:
  • an outside fashion fabric (pieced or wholecloth),
  • a middle layer (typically flannel or muslin), 
  • a lining fabric, 
... that are stitched—or "quilted"—to hold the layers together. I learned this garment construction method from the Queen of Folk Art, and prolific maker of coats and jackets, Rachel Clark. This jacket has both machine and hand quilting. Here is an in-progress photo of the front right. The "white" fabric you see extending out from the edge of the fashion fabric is the middle layer of the "quilt sandwich."
Jacket front (in progress). The individual jacket pieces are
stitched and quilted and then the jacket is assembled. 
Machine quilting
The photo below is the jacket's outside showing the combination of a straight and decorative machine stitches. This process was manual and random. Sometimes I'd watch the color change in the variegated thread [40wt. from YLI] and switch to the decorative stitch to highlight the new color.
Machine quilting with straight and decorative stitches.
I do not mark the lines for quilting (who's got the time?? not I!). An advantage of using a yarn-dyed fabric is that the pattern or "print" is woven into the fabric and it's on grain. You can use the fabric's "print" as a guide for machine quilting with the walking foot.
Machine quilting (lining side).
When the season turns from summer to fall, think about sewing a jacket to wear in the cooler weather. The Houston convention center for Quilt Market was cool and a few evenings were windy and chilly once the sun went down. I was glad I had a jacket—especially one with a pocket!
Jacket front
Here is the follow-up blog post with close-ups of the hand stitching and other jacket details. Because people ask, here is the materials list for this jacket:

:: Yarn-dyed Primitive Stars blue-greyfabric [Diamond Textiles]
:: Multi-colored ikat [Diamond Textiles]
:: Fabrics from Great Wall collection [Midwest Textiles]
:: hand stitching with 12 wt. cotton Spaghetti and Fruitti thread [WonderFil Threads]
:: 40 wt. cotton variegated thread for machine stitching [YLI Threads]
:: cotton fabric for center layer
:: jacket pattern: "Raggy Jacket" by Four Corners Designs

Sunday, April 30, 2017

A vintage and yarn-dyed fabric mix jacket—part 2

Vintage improv jacket.
On this last day of April, I'm listing this jacket in the "Finished in 2017" column. Yay! Here is Part 2 of the process for making this vintage and yarn-dyed fabric jacket. Read about the inspiration and fabric prep in Part 1.

-------
As a quilter, I often incorporate quilting in my garments. Jackets especially lend themselves to this process. I learned this "quilted garment" concept from a fabulous folk artist, instructor and friend, Rachel Clark. Check out Rachel's work and patterns on her website, "Clothing for the Body and Soul," and social media sites for inspiration. She makes amazing pieces!

Three Layers
This jacket is "quilted." It has three layers with stitching to keep the layers together. It has (1) a pieced front, (2) a piece of flannel in the middle, and (3) a silk lining fabric—all sandwiched together. It is machine quilted with straight lines using a walking foot. Stitch length = 2.8mm - 3mm.

Choosing Threads
For the style of this jacket, I thought a cotton thread with a matte finish was appropriate. I wanted a little color and contrast to the creamy yarn-dyed woven [PRF-715 from the Primitive collection by Diamond Textiles] and a color palette that would complement the colors in the patchwork.

I chose a WonderFil 50 wt. variegated cotton (Tutti #TU14) with a soft color palette of grey, lavender, yellow and moss green. (This is one of my all-time favorite variegated thread color combos and one of the things that drew me to the WonderFil line of threads.) The bobbin was also a 50wt. cotton (WonderFil Konfetti #KT306) in a soft blush color that blended nicely with the color of the jacket's silk lining.
Auditioning threads for quilting.
Quilting and Assembly
Because of the woven windowpane pattern in the fabric, it was easy to keep the quilting lines straight and parallel (no marking!). I've been told that the fabric looks like a pinstripe from a distance.
Straight line quilting with the walking foot.
The jacket pieces—left and right fronts, back, sleeves—were quilted before jacket assembly. When I brought this piece to a recent quilt guild meeting, one of my guild friends asked if I cut out the pattern pieces larger to accommodate the shrinkage from quilting. This is a good idea! 

When I plan to quilt a garment, cutting the pieces slightly oversize, quilting them, and then trimming the quilted pieces to the pattern piece is my process. This project started off with another direction in mind, so were not cut oversize. However, the parallel lines of quilting did not cause the pieces to shrink excessively, so it was fine. The flannel (middle layer) and the silk lining (back layer) were cut larger than the front pieces. The larger layers can be seen in the photo below.
Quilted jacket fronts.
Here is the jacket back with straight line quilting. The parallel lines were randomly spaced (again, no marking!). A large zigzag design was quilted on the patchwork insert.
Quilted jacket back with patchwork insert.
The collar was interfaced, faced and turned, but not quilted. The outside edges were top stitched.
Patchwork collar with vintage fabrics.
Here is a view of the quilting from the jacket's inside. The silk lining fabric makes is easy to slip the jacket on and off.
Quilted jacket lining.
Neck and front facings were cut from the yarn-dyed woven. They were tacked down by hand to the lining.
Improv patchwork collar with vintage and modern fabrics.
This jacket is going to Spring Quilt Market with me this year. I'll be meeting with the President of Diamond Textiles and hope to find Mary Kerr on the show floor to show them both how I was inspired by them, their product and techniques.
Vintage Improv Jacket. 
A 2017 finish! Hope you enjoyed reading about the process.

Saturday, April 29, 2017

A vintage and yarn-dyed fabric mix jacket—part 1

Jacket collar detail: a vintage and modern fabric mix.
Another vintage fabric revival!

The inspiration from a recent workshop with author and quiltmaker Mary Kerr that my guild hosted, continues to infuse my creative path. The workshop was called "A Wonky Star, Improv with a Vintage Twist," and it offered techniques and ideas for using, reviving and upcycling vintage textiles into modern quilts.

For this project—a jacket—I paired vintage fabric bits and orphaned 4-patch units with a lovely textured yarn-dyed cotton from Diamond Textiles. This creamy textured cotton fabric is PRF-715 from the Diamond Textiles Primitive collection. I think the yarn-dyed and the vintage make a perfect couple. Don't you?

I've documented the process with photos which will be posted over two blog posts. Let's begin.

The Jacket Pattern
I have a go-to pattern for my jackets. It's Simplicity 4826 (an older pattern that you probably can't get anymore but I mention because people ask). I've got this pattern fitted to my body and I've created several neckline variations, sleeves and jacket fronts for it over the years that I keep in the pattern envelope as well. I also write notes with dates (when I remember) on the pattern pieces, so I know which front or sleeve I used for which jacket. Putting dates beside this information is very helpful—especially when it's been awhile since the pattern was last used.
Jacket pattern: Simplicity 4826
Fabric Prep
The vintage textiles were soaked (washed) by hand in a sink with Vintage Textile Soak. They were air-dried and then pressed.
Soaking vintage textiles.
I tried to keep the patchwork intact as much as possible to preserve the original quilter's handiwork. However, depending on the fabric combination (if it fit the project's color palette) or if the pieces had narrow or frayed seam allowances, the patchwork was dissected and re-stitched.
Examining the pre-washed vintage pieces
It was interesting to see the hand and machine stitching on the vintage patchwork. This quilter used a "backstitch" to secure the threads.
Backstitch by hand to secure the thread.
Working with yarn-dyed wovens
The yarn-dyed fabric, silk lining and flannel (center layer) were also pre-washed and machine dried. I always pre-wash and pre-shrink yardage if I'm making a garment. It's just good policy.

With yarn-dyed wovens, there is no "wrong side" to the fabric. So, you can use either side for the public-facing side of your project/garment. Although the woven pattern on this fabric is geometric, there was a slight difference in the look and tone of the textured windowpane pattern from one side to the other. I marked the side I preferred as the "front side" with a piece of painters tape... to make it easy to remember.
Marking the "right side" of the fabric with a piece of tape.
Improv Piecing with Vintage Textiles
The initial plan was to use the vintage fabrics to create a back yoke for the jacket. Strips of the yarn-dyed woven were improvisationally pieced with the vintage 4-patches.
Possible improv patchwork yoke.
I was not satisfied with how the patchwork looked as a yoke, so it was turned into a lapel/collar. I made a second similar piece to complete the pair—one left and one right lapel.
Improv pieced collar with vintage textiles.
For me, improv piecing is fun. I decided to take the leftover collar trimmings and other vintage bits to make something for the jacket back.
Improv patchwork insert for the jacket back.
The vintage fabrics were auditioned (left) and then a patchwork strip was inserted into the jacket back (right). In the next blog post, I'll talk about the quilting, threads and finishing. Stay tuned.
Related Posts Plugin for WordPress, Blogger...