Showing posts with label vintage textiles. Show all posts

Sunday, April 6, 2025

My third Make Nine finish: mending a vintage quilt

In 2023, I put a new binding on this vintage quilt. During the recent Winter of Care and Repair Challenge, it received a few more patches and mends. I’m certain it won’t be the last time this vintage quilt gets an appliqué over a worn area.

Vintage quilt.

Collaborating with Anonymous

I have a fondness for this quilt! It’s been on the bed for several years. I like its scrappy, make-do, improvisational nature—and that of its maker. While I don’t know who made the quilt, I’m happy to care for it, mend it, keep it in good condition, and preserve the original maker’s work. A happy collaboration with an anonymous quilter!

The quiltmaker had an interesting stash of fabrics to work with for this scrappy quilt.

The original quiltmaker evidently had an eclectic stash of scraps and apparently some yardage (the red and blue prints used for the alternate blocks) for this project. I’m guessing the prints are probably from the 1940s and 1950s. Some fabrics (especially the stripes) appear to be from shirts. The feed sack backing could possibly be from an earlier time. 

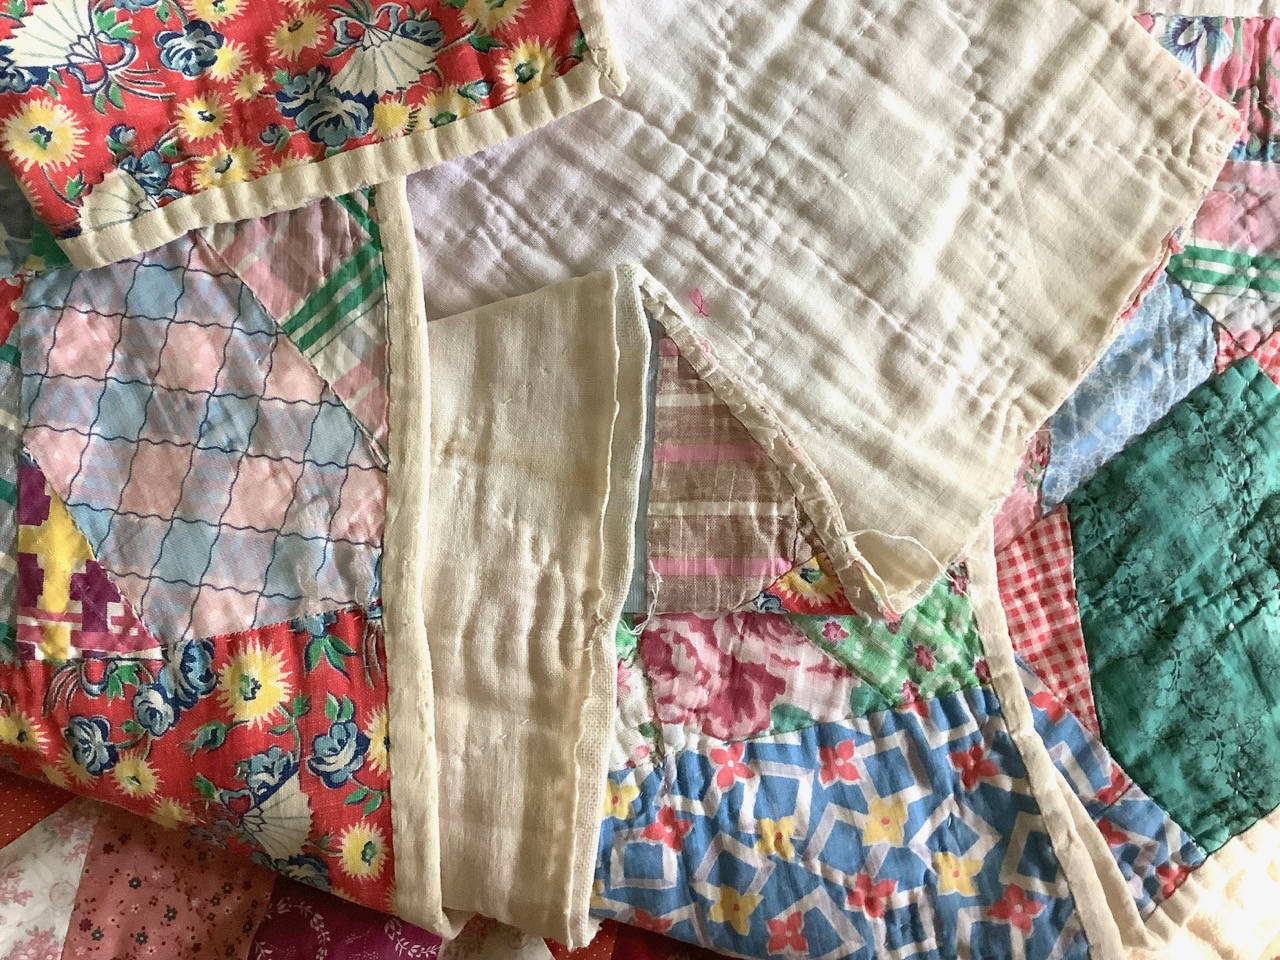
Feed sack backing of a vintage quilt.

I came to find out through making a few of the repairs, that the middle layer is not a batting. It is some sort of woven textile or a blanket. Another make-do attribute of this quilt! So even though this quilt is thin, it’s heavier than one with a cotton batting.

Mixing in new fabrics

On a sales call earlier this year, I saw a quilt displayed in a quilt shop. Several of the fabrics had a retro vibe to them… which reminded me of my vintage quilt. Walking the aisles of the shop, I perused all the bolts of fabrics and purchased several prints that I thought had similar colors and patterns reflective of the fabrics in my vintage quilt.

Purchased new fabrics (left). The tiny floral (far right) is from my stash.

Several of the fabrics I chose are from fabric collections that I rep. It was interesting to focus on individual prints and pull them away from the other coordinating fabrics. Taken out of their original context, they took on a new meaning for me.

The mends

Here are photos of the worn and torn places of my vintage quilt, along with the mends that were made.

Holes and worn areas.

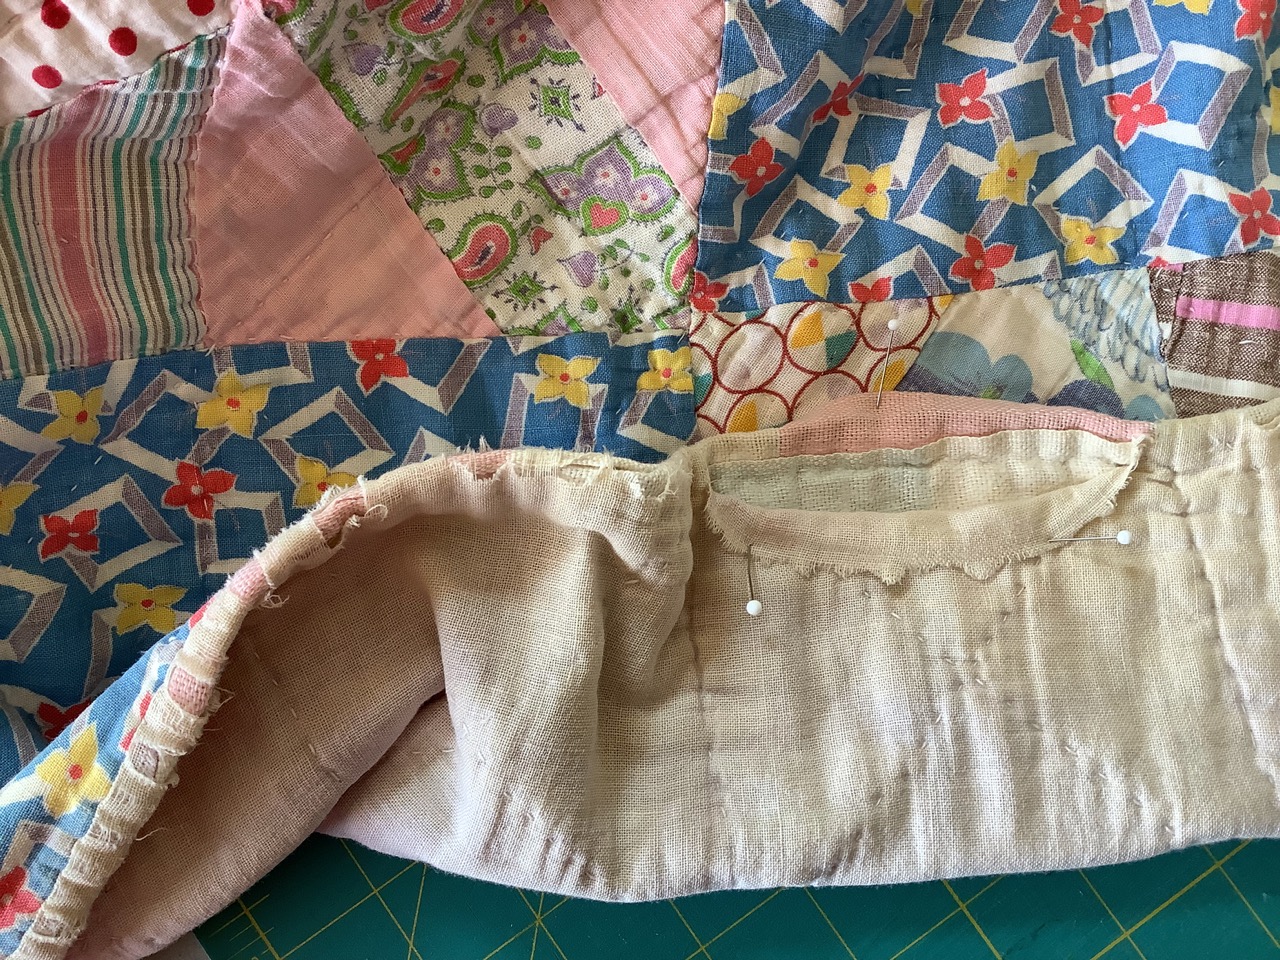
I actually had to unpick part of the binding to make the repair to this area.

Preparing the appliqué patches and the unpicked portion of the  binding.

Patched and mended.

Worn area.

Appliquéd patch with new hand quilting.

After appliquéing the patches, I followed the existing lines of hand quilting to quilt, secure, and blend in the new patches.

A Make Nine 2025 finish


2025 Make Nine tracker with the Mend/Upcycle prompt. March 30, 2025.

One of my Make Nine 2025 prompts is a Mend/Upcycle prompt. I’m counting the mends on this quilt, as well as my participation in the Winter of Care and Repair, to fulfill this prompt. 

Now that I have a curated bundle of vintage-inspired fabrics, however, I’m itching to follow Anonymous’ block pattern and make a few blocks of my own. Maybe coordinating pillowcases with a scrappy cuff are in my future. That would be a fun, easy, and purposeful project.


Sunday, May 21, 2023

A new binding on a vintage quilt, Make Nine finish #5

This vintage quilt has been in need of some "mending love" for quite a while. My Make Nine 2023 "Mend/Repurpose" prompt was just the thing to get this project into the queue. 

Vintage quilt with worn and frayed binding.


Analysis of the vintage quilt

As was often done in the past on utility quilts, the backing fabric (feed sacks, in this case) was used as the binding instead of a separate strip of fabric attached to the edge. The backing fabric was brought around to the front of the quilt—wrapping around and enclosing the edges of the quilt—and then hand stitched to the front to secure. 

It appears there may have been multiple backings on this quilt.

The backing of this vintage quilt was pieced. The fabrics appeared to be feed sacks or flour sacks. The quilt was hand quilted.

Pieced quilt backing made from feed sacks or flour sacks.

There were a few worn places in the patchwork that needed mending. Here is a reproduction fabric that I used to simulate the print and colors of the vintage fabrics.

A worn out area in the patchwork and the replacement fabric.

A new binding 

I had several options for a binding fabric. It was difficult to match the white color of the original binding fabric, so I had to choose something that was "intentionally" different. I opted not to use a very contrasting color—like choosing a color from the patchwork—in order to keep with the feel of the original maker's color scheme. 

Binding fabric options.

I chose Decostitch 715, cafe latte (second from top) from Art Gallery Fabrics. Decostitch has a subtle print that looks like hand stitching and the color did not call attention to itself. 

Double fold fabric for the new binding.

In keeping with the original binding technique, the new binding was machine sewn to the back of the quilt and brought around to the front side for hand stitching. I didn't try to unpick or remove the old binding, but rather covered the frayed edges with a new fabric binding.

New binding machine stitched to the back of the quilt.

Here is a comparison of the newly bound corner and the worn binding at another corner.

Worn and frayed binding (right) and the new binding (left).

Another block with holes was covered with new fabric and then re-quilted by hand. I used a long staple 100% organic cotton thread (2 ply 50 wt.) from Scanfil for both machine and hand stitching the binding, and for hand appliquéing the patches and hand quilting where needed.

An appliquéd patch to cover a frayed area.

Here are the newly-bound edges and corners of this vintage quilt. 

Edges of the vintage quilt with a new binding.

This is officially a time-span quilt that spans the 20th and 21st centuries.

New binding on a vintage quilt.

Make Nine 2023 5th finish

This project fulfils my "Mend/Repurpose" prompt for Make Nine 2023. It's my fifth finish this year.

Make Nine 2023, Mend/Repurpose prompt.

Make Nine 2023 tracking, May 21, 2023.


Saturday, April 22, 2023

Earth Day: Mending a vintage quilt and collaborating with Anonymous

The theme for Earth Day 2023 is "Invest in our Planet." In our little space on the planet, my husband is tending our home garden and weeding the flower beds. My plan is to gather materials to mend the binding edge of this vintage quilt—a quilt that is on the bed and used all the time.

Frayed quilt binding on a vintage patchwork quilt that needs repair.

I realize that adding a new binding onto a vintage quilt will date it to the current year, but I think it's more important to care for and repair the things we have rather than discard them. Mending and repairing this quilt will be a "Collaboration with Anonymous." I like to think that the anonymous quiltmaker who made this quilt early in the last century would be pleased to know it is being used and cared for.

These are the potential fabric options I have for this mend. I'll be doing some auditioning to see what we—Anonymous and I—find most suitable.

Fabric options for a new binding on a vintage quilt.

 A Mend/Repurpose project is also one of my Make Nine prompts for this year.


Oh, and if you're interested in textiles, clothing, and sustainability, try the Sustainable Fashion Quiz on the Earth Day website.


Sunday, December 1, 2019

Quilting Inspiration from the Old [and New] Masters

Following on the heels of my quilt guild's Challenge exhibit, I was extremely fortunate to have an opportunity to visit the National Quilt Museum in Paducah, Kentucky. If you're looking for inspiration, go see a quilt exhibit... or visit a museum—especially one focused on the fiber arts!

"Vases with Fruit" by Jane Dunnewold
"Inspired by the Masters" exhibit #nationalquiltmuseum

Exhibits at the National Quilt Museum
There are always several concurrent exhibits at the National Quilt Museum. This time, the pieces included contemporary quilts and art quilts [a Studio Art Quilt Associate (SAQA) 25th anniversary trunk show], vintage quilts, miniatures and a Quilts of Valor—50 State Salute to Old Glory patriotic collection. Some quilts were by current quilt artists, some by renowned quiltmakers no longer with us, and some resurrected quilt tops by anonymous quiltmakers were finished by 21st century quilters [from the Old Glory collection curated Mary Kerr]. All the quilts were amazing and the exhibits were impeccably displayed.

A New Master is inspired by the Old Masters
As I wandered through the exhibits, I came upon the museum's "The Corner Gallery" exhibit. The bold colors, complementary color scheme, and a somewhat "painterly" look of one of the front-facing pieces caught my eye. As I approached, it became apparent the piece was mixed media, collaged and incorporated vintage textiles and needlework. Then I saw the placard... the artist was Jane Dunnewold!

Having taken a workshop with Jane in 2018, I was thrilled when I saw she was the artist featured in this exhibit! The exhibit is called, "Inspired by the Masters—Jane Dunnewold."

There are 14 pieces in this exhibit. Going from piece to piece, things clicked for me. I saw and was reminded of all the techniques Jane shared with the workshop participants through our week-long experience with her. In this exhibit, Jane cohesively blends multiple techniques and materials into beautiful, thoughtful and playful compositions that are inspired by works of the Masters—such as Henri Matisse, Frida Kahlo and Mary Cassatt.

Mixed Media with Vintage Needlework
My favorite part of these pieces was the incorporation of the vintage needlepoint, hand embroideries and miscellaneous hand stitched pieces by "anonymous" needlewomen. I am a rescuer of vintage needlework and have a small collection of embroidered dresser scarves, pillow cases, orphan quilt blocks and the like. Do you see the Grandmother's Flower Garden quilt blocks in this piece?
"Grandmother Matisse's Flower Garden" by Jane Dunnewold.
"Inspired by the Masters" exhibit #nationalquiltmuseum

Detail: "Grandmother Matisse's Flower Garden" by Jane Dunnewold.
"Inspired by the Masters" exhibit #nationalquiltmuseum

 These are details of "Vases with Fruit," shown above.
Detail: "Vases with Fruit" by Jane Dunnewold.
"Inspired by the Masters" exhibit #nationalquiltmuseum

The filet crocheted edging is left to dangle freely from the table and beyond the edge of the composition.
Detail: "Vases with Fruit" by Jane Dunnewold.
"Inspired by the Masters" exhibit #nationalquiltmuseum

The vintage textiles are seamlessly blended with the painted areas. It's difficult to see where one starts and the other stops.
"View of the Harbor" by Jane Dunnewold.
"Inspired by the Masters" exhibit #nationalquiltmuseum

Sometimes Jane uses hand stitching to bridge different elements
Detail: "View of the Harbor" by Jane Dunnewold.
"Inspired by the Masters" exhibit #nationalquiltmuseum

The "Still Life with Cat" incorporates a needlework canvas with longer, bargello-like stitches.
"Still Life with Cat" by Jane Dunnewold.
"Inspired by the Masters" exhibit #nationalquiltmuseum

Detail: "Still Life with Cat" by Jane Dunnewold.
"Inspired by the Masters" exhibit #nationalquiltmuseum

In Jane's artist's statement, she describes herself as "the bridge between fine art and craft—linking them inextricably together in a dance of old and new—paint, thread and intention." In the list of materials, she includes, "Techniques are all my own—based on 25 years of fidgeting, fudging and making do."

Jane's work is truly inspirational!

Sunday, June 10, 2018

Waste not, want not: the Postage Stamp quilt

The Postage Stamp quilt—a scrap buster project if there ever was one.
Antique postage stamp quilt top. Patches are finished to 1/2 inches square.
I was visiting Margaret at Quilt Connection [Murfreesboro, TN] last month and she said, "Veronica, I have a quilt top you might want to see." She was right!

Wow... and Double-Wow!
Antique postage stamp quilt top.
Even though this postage stamp quilt—a name given to this type of quilt pattern because all the patches are about the size of a postage stamp—is a scrappy quilt, you can tell [she] had a design plan. Standing at a distance, you can see the concentric dark/light rings.
The outside rows of the postage stamp quilt.
The precision of the hand piecing is amazing. These are 1-inch squares that finish at 1/2-inch.
Patchwork squares finish at 1/2 inch.
Several different fabric types can be found in the top... cotton prints, yarn dyed wovens (homespuns), solids, shirtings, a few flannels...
Fabrics: cotton prints, yarn-dyed, shirtings, flannels.
Don't you love the moon from a novelty print peeping out of this patch?
Novelty moon print.
Here is a reference of the size of the patchwork.
Look at the size of these pieces!
Every piece was not on grain, but this quiltmaker was persistent in her workmanship. And she even pieced some of the 1-inch pieces (see the red squares)!
Some of these small patches were even pieced.
Realize this is all hand pieced!
All hand pieced.
Back of the postage stamp quilt top. Hand pieced.
I don't remember what Margaret said the size of the top was, but you can see it would cover a bed. Lots of tiny pieces!
Antique postage stamp quilt.
This quilt top reminds me of the story about the 1863 Jane A. Stickle quilt. The quilt that was the impetus and inspiration of the Dear Jane book by Brenda Papadakis.
Center of the antique postage stamp quilt.
What was going through this quiltmaker's mind as she worked on this project? Were the fabrics from personal and family clothing? Did she collect scraps from other places (fabric mills, perhaps?) or from friends or neighbors? What was happening in her life during the assembly process?
Back of the quilt top showing the hand stitches.
If only these quilt tops could talk.

Sunday, April 30, 2017

A vintage and yarn-dyed fabric mix jacket—part 2

Vintage improv jacket.
On this last day of April, I'm listing this jacket in the "Finished in 2017" column. Yay! Here is Part 2 of the process for making this vintage and yarn-dyed fabric jacket. Read about the inspiration and fabric prep in Part 1.

-------
As a quilter, I often incorporate quilting in my garments. Jackets especially lend themselves to this process. I learned this "quilted garment" concept from a fabulous folk artist, instructor and friend, Rachel Clark. Check out Rachel's work and patterns on her website, "Clothing for the Body and Soul," and social media sites for inspiration. She makes amazing pieces!

Three Layers
This jacket is "quilted." It has three layers with stitching to keep the layers together. It has (1) a pieced front, (2) a piece of flannel in the middle, and (3) a silk lining fabric—all sandwiched together. It is machine quilted with straight lines using a walking foot. Stitch length = 2.8mm - 3mm.

Choosing Threads
For the style of this jacket, I thought a cotton thread with a matte finish was appropriate. I wanted a little color and contrast to the creamy yarn-dyed woven [PRF-715 from the Primitive collection by Diamond Textiles] and a color palette that would complement the colors in the patchwork.

I chose a WonderFil 50 wt. variegated cotton (Tutti #TU14) with a soft color palette of grey, lavender, yellow and moss green. (This is one of my all-time favorite variegated thread color combos and one of the things that drew me to the WonderFil line of threads.) The bobbin was also a 50wt. cotton (WonderFil Konfetti #KT306) in a soft blush color that blended nicely with the color of the jacket's silk lining.
Auditioning threads for quilting.
Quilting and Assembly
Because of the woven windowpane pattern in the fabric, it was easy to keep the quilting lines straight and parallel (no marking!). I've been told that the fabric looks like a pinstripe from a distance.
Straight line quilting with the walking foot.
The jacket pieces—left and right fronts, back, sleeves—were quilted before jacket assembly. When I brought this piece to a recent quilt guild meeting, one of my guild friends asked if I cut out the pattern pieces larger to accommodate the shrinkage from quilting. This is a good idea! 

When I plan to quilt a garment, cutting the pieces slightly oversize, quilting them, and then trimming the quilted pieces to the pattern piece is my process. This project started off with another direction in mind, so were not cut oversize. However, the parallel lines of quilting did not cause the pieces to shrink excessively, so it was fine. The flannel (middle layer) and the silk lining (back layer) were cut larger than the front pieces. The larger layers can be seen in the photo below.
Quilted jacket fronts.
Here is the jacket back with straight line quilting. The parallel lines were randomly spaced (again, no marking!). A large zigzag design was quilted on the patchwork insert.
Quilted jacket back with patchwork insert.
The collar was interfaced, faced and turned, but not quilted. The outside edges were top stitched.
Patchwork collar with vintage fabrics.
Here is a view of the quilting from the jacket's inside. The silk lining fabric makes is easy to slip the jacket on and off.
Quilted jacket lining.
Neck and front facings were cut from the yarn-dyed woven. They were tacked down by hand to the lining.
Improv patchwork collar with vintage and modern fabrics.
This jacket is going to Spring Quilt Market with me this year. I'll be meeting with the President of Diamond Textiles and hope to find Mary Kerr on the show floor to show them both how I was inspired by them, their product and techniques.
Vintage Improv Jacket. 
A 2017 finish! Hope you enjoyed reading about the process.
Related Posts Plugin for WordPress, Blogger...