Sunday, October 22, 2023

Needlework buttons: historical techniques using contemporary materials

The internet diminishes the distance between needleworkers for sharing ideas and techniques. From my kitchen table, I joined a group of UK stitchers and embroiderers this weekend for a Zoom workshop on making needlework covered buttons.

Needlework covered buttons from a recent workshop with Gina Barrett.

The two-hour workshop, called “Curiously Wrought: Making Needlework Buttons with Gina Barrett,” was sponsored by the Embroiderers’ Guild in the UK. Gina Barrett, the workshop’s instructor, is an author, illustrator, entrepreneur, and maker. She brings her passion for period costumes and historical passementerie to her workshops and her extensive experience in the craft is evident in her ease and skill of presenting and teaching these historical button-making techniques.  

Stitching commonalities 

Although there is a distinction between “embroidered” buttons and “needlework” buttons, Gina explained, if you are an embroiderer or hand stitcher, you’ll find many that of the stitches used in making needlework buttons seem familiar. Several workshop participants sited using the stitches in other textile disciplines—although were called by a slightly different name. In this workshop, we used the basic the rounded back stitch, blanket stitch, and a spiderweb stitch for our class buttons.

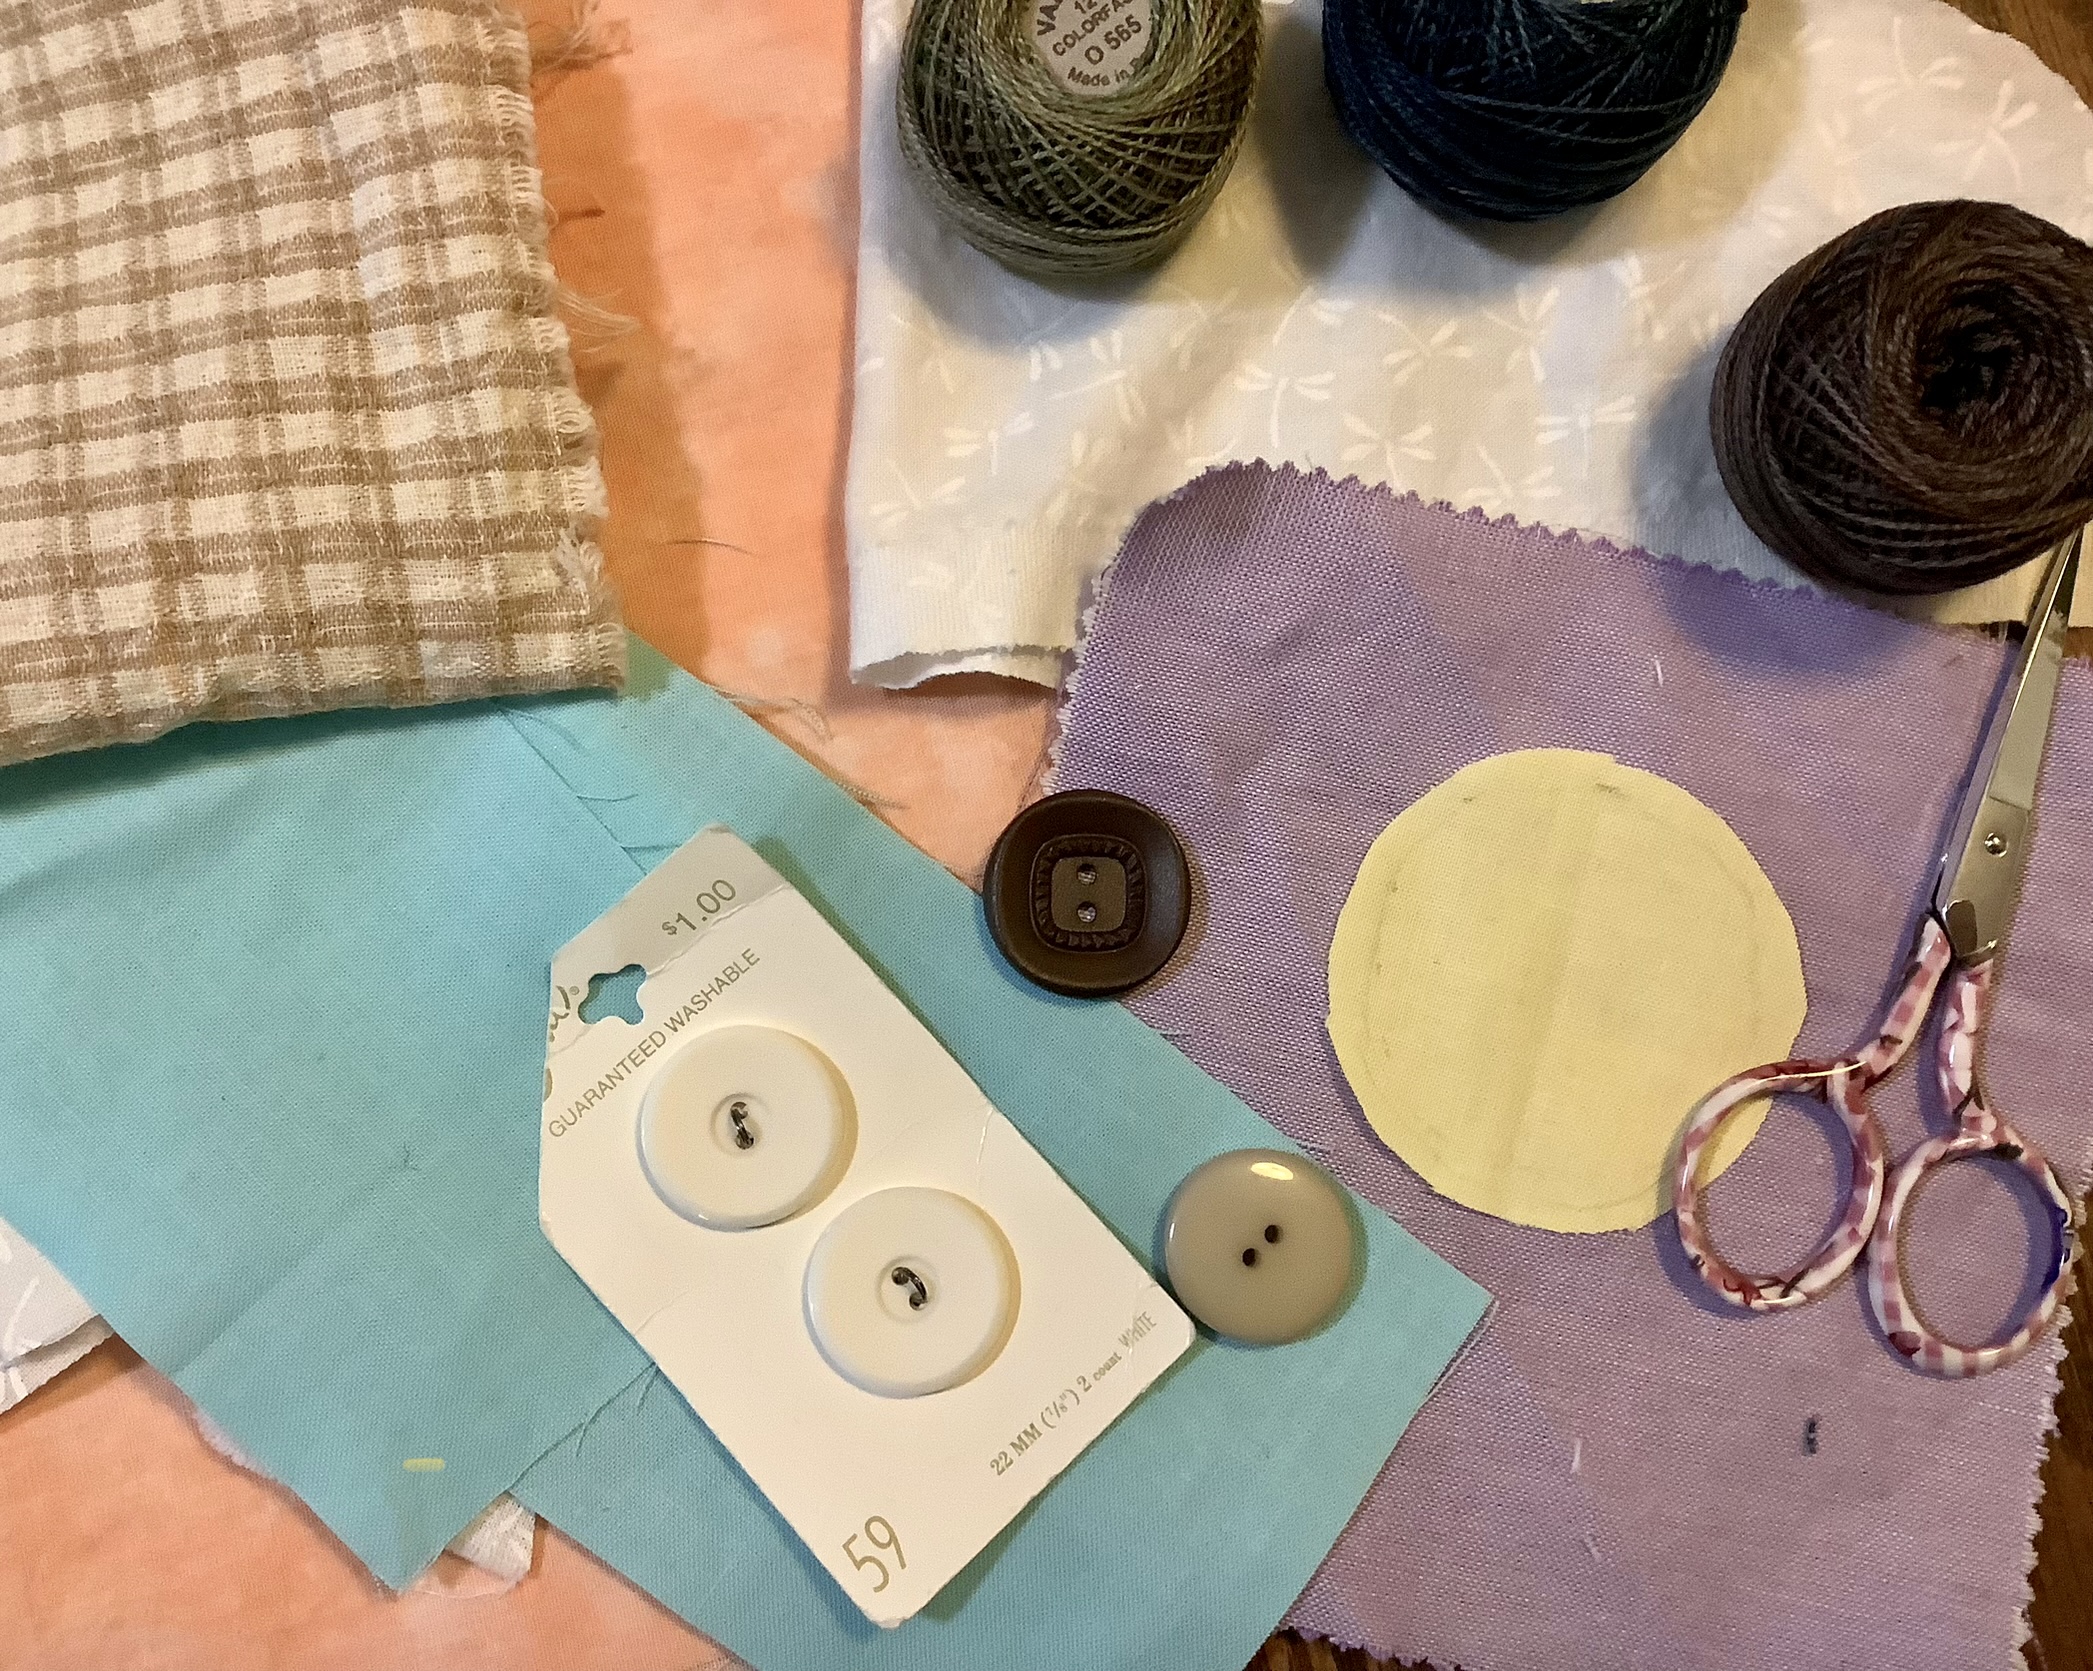
Supplies for making needlework covered buttons.

Button-making supplies are probably already in your stash

The supplies needed for this technique are minimal and comprised of items that most needleworkers and stitchers have on hand—perle cotton thread, small fabric scraps, buttons, needles and scissors. Workshop participants learned three button designs. Compared with historical buttons that were made in the 16th, 17th and 18th centuries, today’s needleworkers have myriad threads, fibers, colors, and thread weights available in the market to provide endless possibilities for creativity and developing unique designs. Gina was very encouraging and supportive of experimenting with any of them. 

Finding your rhythm

As one would expect with any new skill, continued practice will provide more consistent results. Gina indicated that once you find a good stitching rhythm, balanced thread tension usually follows—providing more desired results. 

This workshop was a wonderful experience and the buttons were fun to make! My first attempts need more finessing (obviously—by the photos), but now that I have a general understanding of the basics for making needlework covered buttons, I’ll be applying more effort and practice into achieving finer results.

I’m adding needlework buttons—another small, portable project—to my travel bag repertoire.


Sunday, October 15, 2023

Simple techniques yield big impact with texture and color

Don’t ya love projects that make a statement but are easy to make? These small projects use basic techniques, require minimal tools and supplies, and still make an impact because of their colors and textures.

Woven coaster and hand knit cotton dishcloths are easy projects.

Loopy Loom woven coasters

Tools and Materials: Loopy Loom, worn out socks, scissors, crochet hook

On occasion, I love to pull out my red Loopy Loom and weave a coaster or a pot holder from worn out or orphan socks. My metal Loopy Loom came with a long metal hook for weaving, but I use my fingers for the tabby (plain weave: over 1, under 1) weaving technique. Stripes and other patterns on socks add color and interest to the woven texture. 

Use the Zoom Loom and a pair of worn out socks.

I use a crochet hook to finish the looped edges after the weaving is complete. We use these small weavings for coasters (hot and cold beverages), hot pads/trivets, and pot holders. This is a wonderful re-purposing project and great way to upcycle unrepairable socks.

Hand knit dish cloths

Tools and Materials: cotton yarn (variegated, solid, or both), knitting needles, crochet hook, yarn needle for weaving in the yarn tails.

Hand knit cotton dishcloths.

Using a linen stitch pattern, the slip stitch knitting technique creates a firm fabric and an interesting texture on these hand knit dish cloths. With a variegated yarn, there is an additional lovely color interchange created by the slipped stitches from the row below. This is the perfect stash-buster yarn project! Use up those extra little balls of yarn for a fun and useful project. 

A crocheted edge in single crochet or a slip stitch unifies the piece and finishes the edges. A yarn needle is helpful to weave in the yarn tails. 

Hand embroidery on printed fabric

Tools and Materials: embroidery floss, embroidery needle, embroidery hoop (optional), scissors, a fabric print

Basic embroidery stitches: back stitch, stem stitch, French knots, pistil stitch (long French knot), running stitch, straight stitch, blanket stitch.

Hand embroidery on a printed fabric panel.

Using fabric prints and fabric panels is NOT cheating. Capitalize on and enhance the printed motifs on fabrics. 

This is a cotton fabric panel from an upcoming holiday collection from FIGO Fabrics. Using 2 or 3 strands of embroidery floss, I’m embroidering around motifs and on the outlines. Any basic embroidery stitches will create beautiful textures. An embroidery stitch dictionary also has loads of inspiration for experimenting with new stitches. 

Hand embroidery on a printed fabric panel.

Choose floss in holiday colors, neutrals, brights, or colors from nature. Embroidery floss is inexpensive and readily available in a multitude of glorious colors. Or experiment with other beautiful threads such as perle cotton (various weights), cotton sashiko thread, and novelty yarns and threads. Got a thread stash? This is the perfect small canvas to use savored lengths and leftovers from other projects.

Hand embroidery on printed fabric panel.

These embroidered pieces can be backed and stuffed with a polyfill. A ribbon or yarn loop can be added to create holiday ornaments or gift decorations. Or they can be displayed as home decor in a festive bowl or basket.

Make small projects with big impact and happy stitching!


Saturday, October 7, 2023

Cold Front = long sleeves or jackets?

We awoke to mid 50-degree temperatures this morning. The cold front came through overnight and the upcoming week is predicted to be in the mid-60s to mid-70s. Although I welcome the crisp, cooler Fall weather, I have two short sleeve Bristol knit tops cut out and ready to sew!

Bristol Top with short sleeve version cut out.

Short sleeve pattern hack

I've made the Bristol Top several times. It looks different with every fabric print and it's fun to mix and match fabrics for color blocking. The pattern pieces lend themselves to several fabric combinations—yoke, sleeves, cuffs, bottom flap. 

On a re-make in 2022, I did a pattern hack—to make a short sleeve version. This weekend, I wanted to fine tune the sleeve by shorting the length and making the opening slightly larger to allow for more movement.

Short sleeves cut out and ready to sew.

The original sewing plan

I got an itch to do some garment sewing last month. My original plan for a new Bristol was:

  • to use up knit fabric remnants from my stash,
  • add to my short sleeve knit top wardrobe (I have mostly long sleeve knit tops),
  • fine tune the short sleeve pattern piece from the previous pattern hack.

The sleeve pattern was modified. I had all the pieces cut out for two short sleeve versions... ready to sew. 

         Now the darned cold front has moved through...

Another fabric combination for a new Bristol Top.

Throwing caution to the wind, I say, "Too bad on the weather forecast!" I'm sticking with the original plan and will take a jacket along. 

Plus, you can't always trust the weather forecast, now can you???


Related Posts Plugin for WordPress, Blogger...