Wednesday, December 22, 2021

My last Make Nine finish for 2021: A string quilt UFO

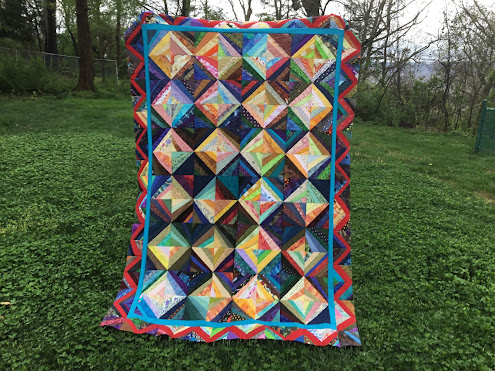
This quilt spans two centuries.
It incorporates fabrics and quilt blocks from four decades—the 1990s, 2000s, '10s and '20s.
It's a string scrap quilt and my last finish for Make Nine 2021, the UFO project.

Scrappy string quilt. Make Nine 2021.

"She had a deep scrap basket."

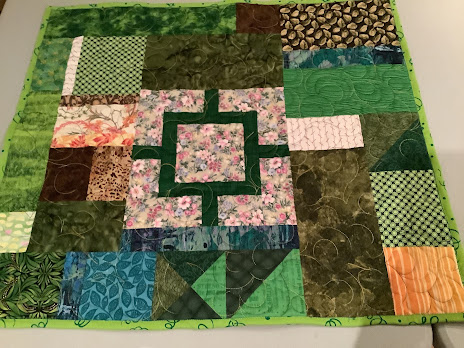
This string quilt top was finished in April of this year, 2021. The blocks are a combination of left-over blocks from a 1990s quilt, demo blocks from a quilt guild program in 2017, and the remaining blocks are a stash buster with fabrics spanning four decades—including this one. This is what they mean when they say, "she had a deep scrap basket."

String quilt top completed in April 2021.


Free-motion quilting on a domestic sewing machine

With a recent sewing machine upgrade—to a Janome M7—this was a perfect project in which to "kick the tires" and put the machine through its paces. The 13.5" bed made maneuvering the quilt sandwich a breeze. This project prompted me to clear off the card table to the left of my machine and the drawing board at the back of the machine so I had plenty of space to rest the quilt and build a quilting nest.

Machine quilting on my domestic sewing machine.


Scrap quilts are so forgiving! 

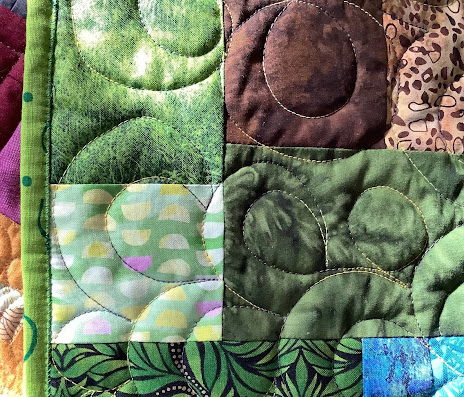
You can hide a lot of flaws when quilting a scrap quilt. The variety of fabric prints and colors will camoflauge any wobbly quilting and inconsistencies. At my whim, I did free-motion swirly/loopy designs in the "light" diamonds... and zig-zags and straight line motifs in the "dark" diamonds. All different designs or a "variety on a theme." The different motifs tested the capabilities of the machine and the operator (me).

A sampling of free-motion quilting patterns appear in the blocks.

I practiced rulerwork and ditch quilting on each side of the narrow inside border. I like the ruler foot that comes with the M7.

Rulerwork and ditch quilting the inside border.

The faux piped binding was comprised of a newly-purchased DecoStitch Elements from Art Gallery Fabrics and a Canvas blender from Northcott. The binding was attached completely by machine.

Faux piped binding. Applied all by machine.

I decided to add a meandering doodle in the narrow border. This was a last minute decision, but thought the border was too wide to go without any quilting.

Faux piped binding and free-motion doodle in the inside border.

I took my time sewing on the binding (taking 3 hours) but I got that bobbin thread close to the ditch on the back.

Stitching line for the binding (shown from the back).

I used the royal blue 108" Canvas wide backing [Northcott] for the backing fabric. The the texture from the free-motion quilting patterns shows quite nicely on this tonal wide back.

Free-motion quilting seen from the back of the quilt. 


Quilt Stats

Cotton and poly threads used for free-motion machine quilting.

Here are the quilt stats for the string quilt:

  • top threads: 50 wt, 40 wt. variegated cotton threads [by Wonderfil Threads, Superior Thread, YLI]
  • 50 wt 2-ply cotton thread [Aurifil] for the rulerwork ditch quilting
  • bobbin thread: Glide trilobal poly thread [by Fil-Tec]
  • 19.5 hours free-motion quilting and rulerwork
  • 3 hours to attach the faux piped binding completely by machine
  • finished December 19, 2021
  • finished size: 59" x 83"


All Together Now

It's about time these orphan quilt blocks found their way to a finished quilt! They're All Together Now.

"All Together Now" finished size 59" x 83"

And all 9 of my Make Nine 2021 projects are complete!

Make Nine 2021 worksheet.


Saturday, December 18, 2021

A new, green kitty quilt

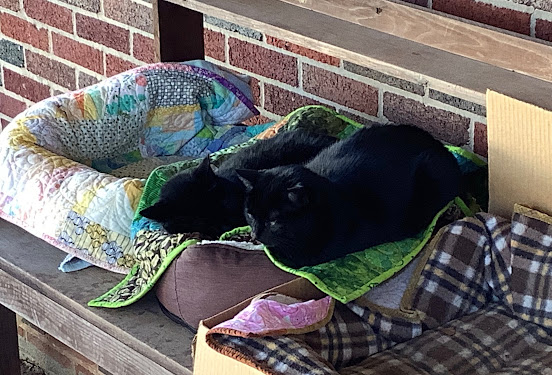
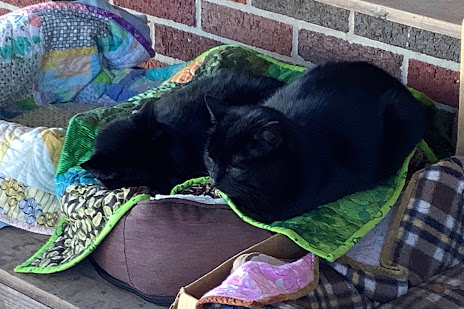
Now that we've had several cold December nights, the kitty beds on our back porch are more frequently occupied. Sometimes the kitties sleep single, sometimes in pairs, and sometimes they're in a big black-and-white pile where you can't tell where one cat ends and another begins. This is Stan Leigh and a buddy on my latest, green kitty quilt.

Stan Leigh and friend in a kitty bed.

After the long process of working on my guild Challenge entry, it was nice to whip out a small, stress-free quilting project—like a kitty quilt.

Let's Go Green

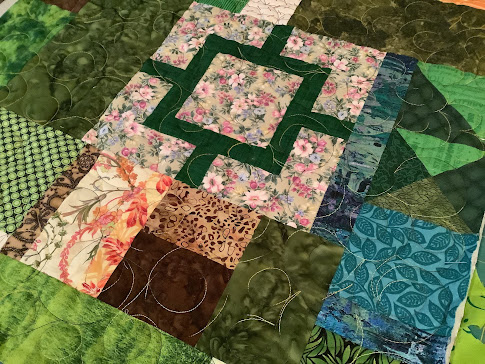
This quilt started with a test block. I pulled from my stash of green fabrics and patchwork scraps to go with the orphan block. 

A test block converted into a small kitty quilt.

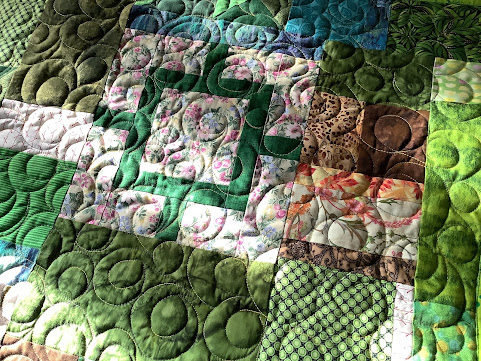
A loopy, all-over free-motion quilting design was quick and fun.

Free-motion quilting.

The zingy, lime green binding was applied by machine. I think this binding livens it up the color palette.

Machine binding.

Voila! A new kitty quilt for our entourage of tuxedo kitties.

Green kitty quilt.

I think the black kitties look quite dashing against the green fabrics.

Two black cats in the kitty bed with the green quilt.


Friday, December 10, 2021

My Picnic Dropcloth: a stitch and thread sampler

The pandemic moved many of us to the mindfulness and calming effects of handwork—stitching, embroidery, English paper piecing, sashiko, mending, and the like. Something that caught my eye on my Instagram [IG] feed this summer was the Picnic Embroidery Sampler hand embroidery stitch-along hosted by embroidery artist, Rebecca Ringquist of Dropcloth Samplers

Picnic Stitch Sampler from Dropcloth Samplers. 5.5" x 4.25"

Although I couldn't make the stitch-along calendar coincide with my schedule, I did purchase one of the pre-printed sampler canvases to work on at my own pace.

Progress on September 17, 2021.

An ideal portable project for travel

This—and small samplers like this—is a great portable project for traveling stitchers. Minimal supplies are needed and all the bits fit nicely in a small zipper pouch that can be tucked into one's travel bag.

Travel tools for hand embroidery projects.

A sampler is a sampler is a sampler

While this is designed to be a embroidery "stitch" sampler, I think mine is more of a thread sampler. I tested and used a variety of threads from my thread collection—6-strand embroidery floss, perle cotton, and a "new find" was a cotton hidamari sashiko thread [from Lecien] that was the perfect weight and thickness.

Hidamari 100% cotton sashiko thread, size #22/6 [from Lecien]. 

With the multitude of hues and shades available in 6-strand embroidery floss, I used floss for stitching the flowers. The colors and stitches were easily blended and I could "create" intermediate colors by combining strands from two different colors in the needle if needed. For the French knot flower centers I used a combination of 3- and 6-strands of floss.

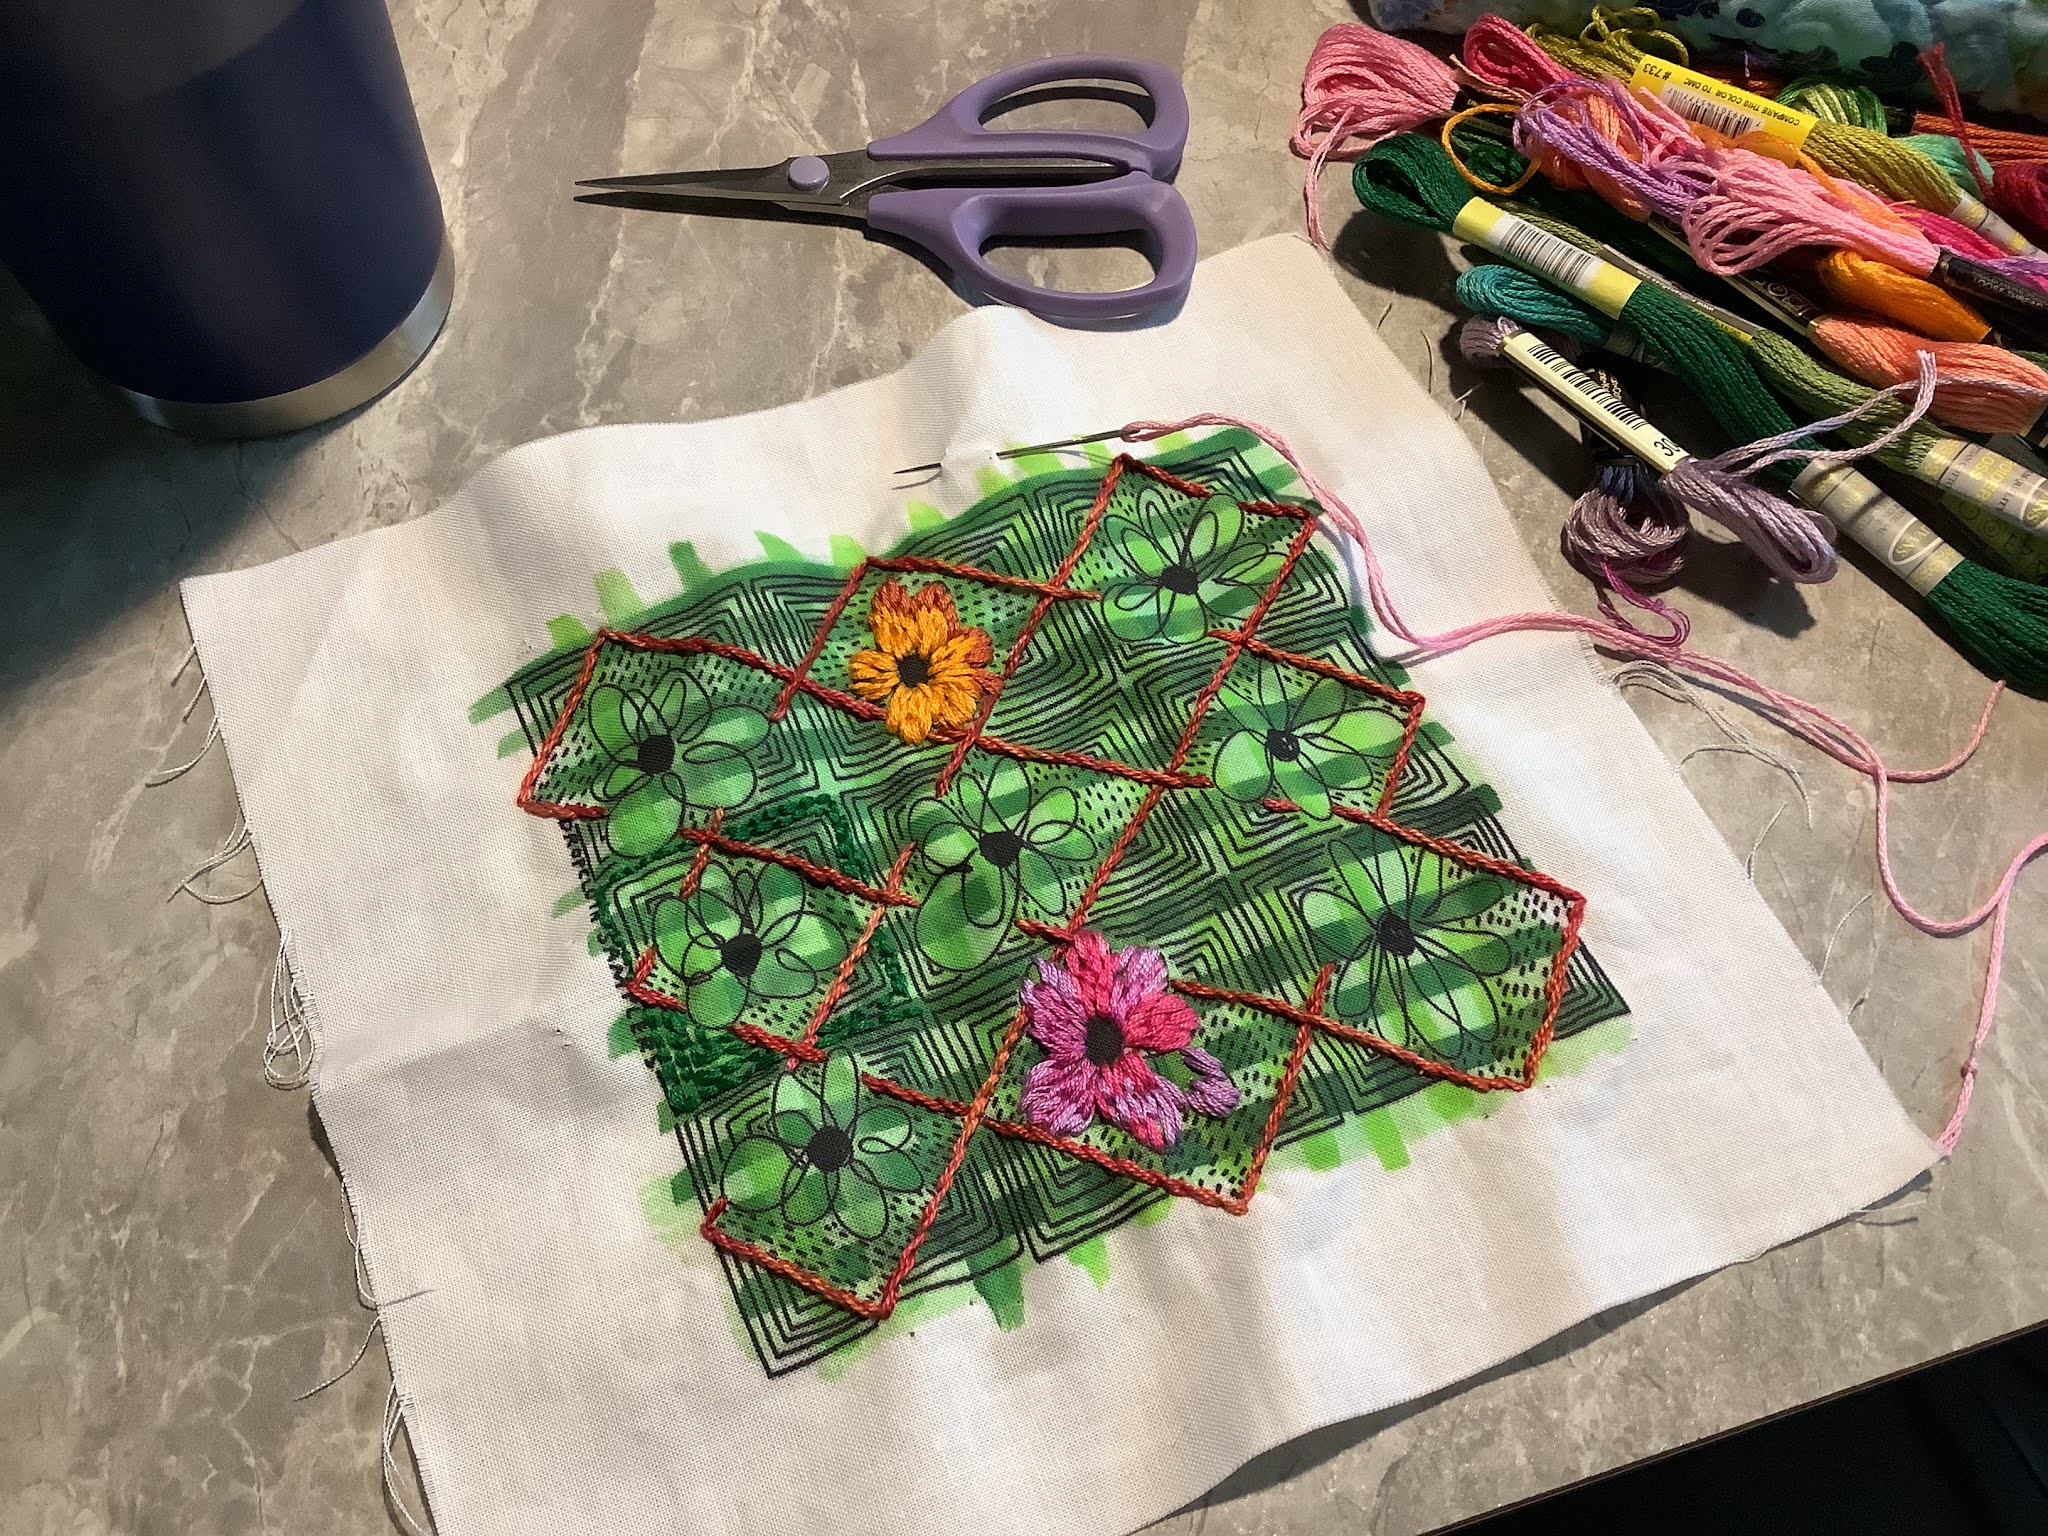
Progress on October 26, 2021

The surrounding "grassy" area was comprised of a sampling of different threads. I used 8 wt. perle cotton, 3- and 6-strand floss and a hidamari sashiko thread size #22/6. The sashiko thread was smooth and lovely to work with.

Progress on December 5, 2021.

Once the marked areas were stitched, I decided to add a few more rows around the perimeter so all the diamonds were surrounded by green. The finished piece is 5-5/8" x 5".

December 7, 2021. Picnic Dropcloth Sampler. 5-5/8" x 5"

I plan to block the piece and at some point, work it into a larger project—a zipper pouch, small project bag, or possibly a needle book. For now, I'm calling it "finished." It's colored red on December 7 and documented on my Stitch Success Tracker.

December 7, 2021 Stitch Success Tracker.

And I' don’t  apologize for a "messy back." It’s part of my process… part of the structure… part of the form… part of the story.

The back view of my Picnic embroidery sampler.


Sunday, November 28, 2021

Guild Challenge 2021: Experiments, discoveries, feedback

Every quilt teaches the maker something! I think you learn more if you try something new, or different, or unexpected... and step outside your "norm" during the process. In making my 2020-2021 guild Challenge, there were things I experimented with, discovered and learned from the process and from viewer feedback.

"Alone Together" by Veronica Hofman-Ortega
Finished size: 65" x 67.65"   November, 2021

New things I tried

A Guild Challenge is the perfect venue for trying new things—techniques, materials, composition, or whatever you've always wanted to try but something stopped you. Your guild provides a safe environment to try something—whether you think you failed or succeeded—and fellow guild members are supportive of you and your endeavors.

In the Discussion and Feedback portion of our Challenge Reveal guild meeting, several participants said they indeed tried something that was out of their comfort zone in this challenge. Bravo to all of you! 

Here are the new things I tried with this Challenge and my discoveries from working on it.

  • I used a wool batting in a quilt for the first time. My usual go-to batting is 100% cotton. I think the wool provided a little more dimension and loft in the unquilted areas. Wool is also a breathable fiber and will provide warmth.
Improv pieced letter blocks.
  • Over the last few years, incorporating words on quilts has resurfaced as a trend. This was my first use of patchwork letter blocks. The blocks were pieced totally improvisationally—laying out the darker fabrics [the letterforms] on the cutting mat and then cutting strips, rectangles and triangles of lighter fabrics for the background. Somewhat like "writing—or printing—letters with fabric." As a typographer, I was in my element creating letterforms again!
  • With this quilt, I experienced a love-hate relationship with rulerwork. I have used rulers before, but not on a large quilt. Using a ruler was easier in the center when the rest of the quilt was not yet quilted (the quilting makes the quilt heavier). As I quilted outward from the center, the quilt got heavier. Turning the quilt for using the rulers in the direction that was comfortable for me got to be more time consuming and cumbersome.
         I'm all about "having fun" with the quilting... and occasionally, this was not a fun part... especially toward the end.
  • The scrappy flat piped binding turned out especially well (in my opinion). I've done flat piped binding (or faux piped binding) on previous quilts, but this time I made the piping scrappy. 


Discoveries and things I learned

  • When quilting the scrappy heart blocks, I initially used a chalk-o-liner to mark a center heart. The second idea was to cut a heart from freezer paper and use it as a template to free-motion quilt around it. Much better, much easier and faster!
Scrappy heart blocks for the border.
  • I'm glad I included the scrappy heart blocks around the outside of the center. At one point (with not much time to finish this quilt before the deadline), I considered just the center section as being the finished piece. I'm glad I "listened to the quilt."
  • Something I learned from making a scrappy flat piped binding was to remember the orientation of the binding strip. With the piped binding process, the binding is attached to the back and rolled to the front for stitching. I understand this, but when I was planning certain fabric colors to coincide with the adjacent patchwork. I laid out the piping strips on the quilt top, but when the binding was attached, it was in reverse order. 
         Thankfully, serendipity stepped in and the color placement turned out well all the same. I chalk this up to it being a "true" scrappy quilt.
  • I really wished I had allowed more time to quilt a quilt this size... especially with custom quilting. I think I would have enjoyed the quilting part more.
Half-square triangle crumbs
  • Crumbs and scraps: It was fun to use tiny triangle trimmings for the HSTs and fabric swatches/scraps for the scrappy heart blocks. This was a welcome, stress-free and feeling-productive process during the pandemic lockdown.
Scrappy heart (before).

Scrappy heart (after).
  • A study in value: The fine tuning of the center section and incorporating the scrappy heart blocks was a good exercise for determining the correct value (lightness/darkness). I actually took out part of one heart (after it was pieced into the top!!) and replaced the fabrics with some of darker value. 


Viewer feedback

This year, my team presided over the Challenge Reveal presentation a bit differently. Rather than having the makers get up and talk about their inspiration and process, I decided to ask for feedback from the viewers for each quilt first. 

So often, quilt makers don't hear what viewers think about, were impressed with, or found interesting about their work. I think feedback is important for the makers... and important for viewers to be able to verbalize what they see in the work.

Here are insights about "Alone Together."
  • viewers mentioned they liked the variety of quilting motifs.
  • they noticed the color/value difference in the center section and the contrasting quilting motifs that helped define that part of the composition.
  • they liked the fussy cut images from The Ghastlies in the "windows."
  • one of my fabric clients, with whom I shared an in-progress photo, keyed in on all the small scraps in the HST units. She identified with using stash fabrics and leftovers during the pandemic. This is exactly what I did! (I believe many of us quilters and makers were alone together doing the same thing!)
With this feedback, I feel my quilt was successful in meeting the Challenge parameters and also was a good composition in itself.

First Place ribbon, Guild Challenge 2020-2021.

Details about the design and piecing phases for making this quilt and the quilting and binding including the quilt stats, are in these previous blog posts. Thanks for reading!


Related Posts Plugin for WordPress, Blogger...