Showing posts with label free motion quilting. Show all posts

Thursday, May 7, 2026

Free-motion quilting and May Day at the Folk School

I’ve just returned from an invigorating weekend teaching Intro to Free-Motion Quilting at John C. Campbell Folk School, and I’m still riding the wave of creativity and camaraderie that filled those three days. 

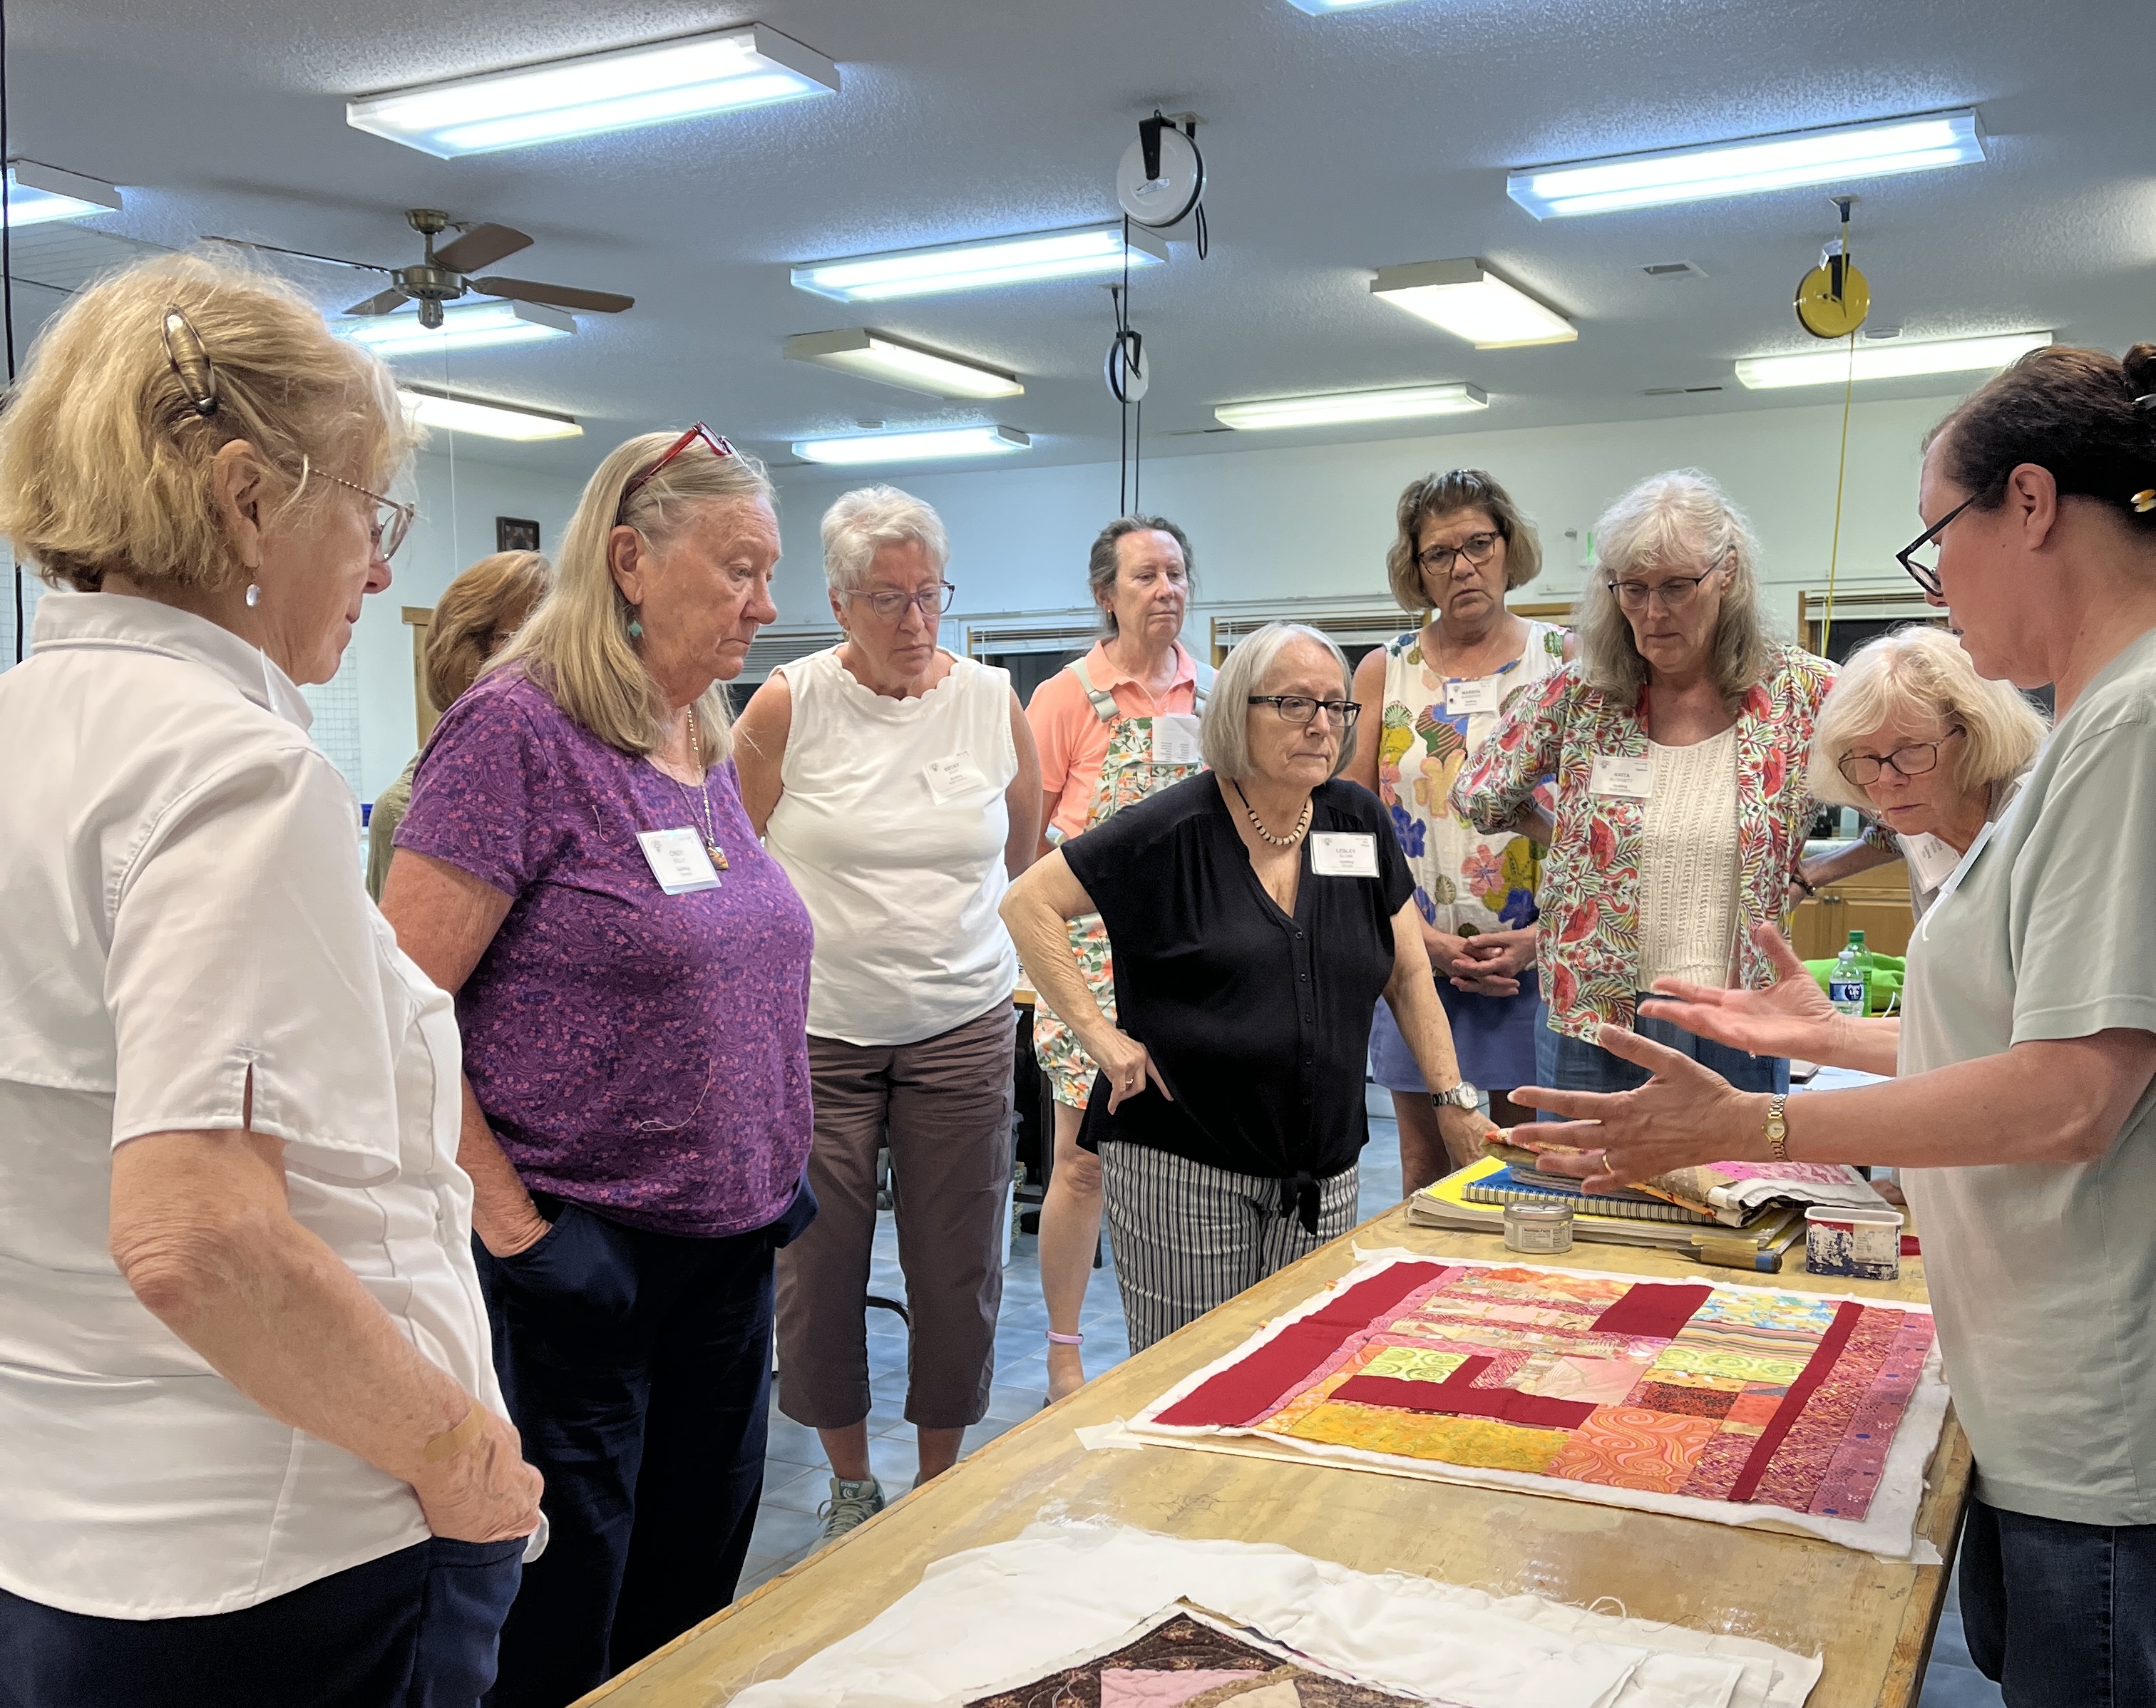
Students gather for a quilt turning show and tell in Intro to Free-motion Quilting class
at John C. Campbell Folk School early May.

I had an eager group—eight students plus my wonderful studio assistant—which made for an intimate, focused, and interactive learning environment. 

At the Folk School, we meet students where they are. Prior quilting experiences in this group ranged from walking foot quilting, straight line quilting, some free-motion experimentation, and a self-taught student who had been learning from books and online quilting resources. Everyone in the group, however, brought curiosity, openness, and a willingness to experiment—exactly what free-motion quilting calls for!

Free-motion quilting students in the spacious quilting studio, Louise Pitman Fiber Arts building.
A basted quilt from the demonstration is in the foreground. 

We dove right in on Friday evening with a presentation about quilting goals, terminology, basting tools, and then a demonstration on quilt basting. By the end of the evening, students had several quilt sandwiches ready to go for the next day’s hands-on practice.

Drawing in the sketchbooks

Alongside the free-motion machine work, we spent time with our sketchbooks doing drawing exercises—what I like to call “brain aerobics.” These exercises help train the brain, eyes, and hands to work together more fluidly. 

Pat intently concentrates on drawing in the sketchbook.

Christine (left) and Shannon with their contour drawings.

Pam practicing free-motions quilting motifs in the sketchbook.

Nancy (left) and Pam showing their contour drawings.

Roz is drawing inspiration from fabric collections.

Kathe finds inspiration for quilting motifs from a fabric collection.

It was exciting to see students loosen up, have fun, and discover their free-motion potential. The transition from the morning’s work to the quilting motifs they generated at the end of the day showed confidence and their command of new patterns and quilting possibilities.

Helen is wearing quilting gloves to help with moving the quilt sandwich.

Kathe practices the sketchbook drawings with the sewing machine.

Covering quilt-making concepts and topics

Throughout the weekend, we covered a wide range of foundational topics: battings, thread weights and thread fiber contents, needle selection, several classic quilting motifs, and even the often-overlooked but the important and meaningful detail of including quilt labels.


A published author among us

My studio assistant, Kim Deneault, is also a published author! She shared the story of her quilting book, Raggedy Reverse Appliqué, with the free-motion students and showed several project samples. 

Kim (left) talking to Pat about quilting projects.

Oh, you can definitely combine this reverse appliqué technique with free-motion quilting. Check out Kim’s book.

Raggedy Reverse Appliqué book by Kim Deneault with projects.

Show and Tell: a quilt turning

During my free-motion workshops, I share examples of my work which always sparks great discussion about design approaches, thread choices, and quilting techniques. 

Show and Tell of my quilts.

“Alone Together” improv quilt from a 2020 Guild Challenge.

One of the quilts, Paris Rendezvous, was a panel quilt that incorporated a soft circuit. LED lights turned on and blinked when a battery was inserted and the circuit was connected.

Talking about e-textiles and soft circuits in Paris Rendezvous, a machine quilted panel quilt.

As an instructor, it’s always a pleasure to open that window into my process and see how it resonates with the students.

Group discussion about thread choices, micro-fills, and decorative machine stitches.

A full May Day Saturday agenda

In early May in the foothills of the Appalachia mountains, the Folk School attendees were greeted with cool mornings, mid-morning sunshine, and those unforgettable Carolina blue skies. As if the classroom experience of learning free-motion quilting wasn’t a full enough schedule, the Folk School offered another layer of magic—the May Day celebration and an English Country Dance weekend. 

The May Day parade started in the Festival Barn, just outside the quilting studio.

The participants of the May Day parade assembled in the Festival Barn which is next to the quilting studio. We had a front row seat from our studio windows: large puppets, dancers, banners, and music.

The beginning of the May Day parade at the Festival Barn.

The weekend was jam-packed with a May Day parade, a May pole dance, and demonstrations by the dancing troupes. Lively, dancing and musical activities were held on Saturday in which students, instructors, and folk school staff were able to take part. It was a beautiful reminder of seasonal traditions and community spirit.

Evening dance performances at the Spring Dance weekend.

Morris dancers in the Community Room, Keith House.

Wrap up and group discussion

One of my favorite parts of the workshop is the rich dialogue that develops and comes out during our final workshop discussion. I like to know what information students found most helpful and anything they were surprised to learn.

Group discussion and recap of the workshop.

The discussion entailed these highlights:

  • There was so much information, “I wish had taken more notes... on everything.”
  • All the little tips: bringing up the bobbin thread at the end: when to change the needle; pull thread out of the machine at the bottom (at the needle); work bigger!
  • loved the practice quilt sandwiches; didn’t have the pressure to work on a ‘real’ quilt top. I have extra quilt sandwiches to continue practicing at home.
  • learned the continuous line process, how to link different motifs.
  • learning about different threads and thread weights. “I’ve never sewn with 60 wt.”
  • freedom to move in any direction.
  • realized the value of the sketchbook.
  • “if you can draw it, you can quilt it.”
  • lots of inspiration from seeing [the instructor’s] quilts and samples.
  • I must remind myself to “let it go!” There are no boundaries.
  • some students found ideas for quilting the quilt tops they have waiting to be quilted—an Irish Chain, Quilts of Valor quilt tops, a collage quilt.

I’m always thrilled when students grasp the value of drawing in and using the sketchbook. I have several and bring a few to these classes with the corresponding quilts. There are so many advantages to working out designs on paper first!

An example of the relationship between the sketch and the final quilt.

Oftentimes during these group discussions, students pose insightful questions that lead to an unexpected, but valuable, tangent. One topic that surfaced was using hand quilting stencils to mark areas for free-motion quilting. This is the kind of collaborative exchange where even more learning happens—not just for students, but for me as well!

Group discussion: practice sandwiches with template markings.

Class participants received Certificates for completing the workshop.
Then, I share the “secret” for successful free-motion quilting.

Thank you!

My free-motion quilting weekend was, in every sense, a full and fulfilling weekend—learning, making, connecting, and celebrating. Thank You to each student for spending their time with me at the Folk School and bringing their enthusiasm and curiosity to the workshop. 

Intro to Free-motion Quilting, May 1-3 2026. John C. Campbell Folk School.

Thank you to Kim, our studio assistant, for bringing her quilt-making insight and another aspect [Raggedy Reverse Appliqué] to the workshop, for taking the myriad of photos, and helping everything run smoothly. 

Me with my studio assistant, Kim (right).

Incidentally, Sunday, May 3, the last day of the workshop, was National Textiles Day, which is especially fitting. Spending the day discussing fabrics, thread, and free-motion quilting techniques felt both meaningful and perfectly (although mostly serendipitously) timed.

Fiber Arts building and quilting studio at John C. Campbell Folk School.

Experiences like this are why teaching at the Folk School is so rewarding. There’s something special and magical about gathering in a place dedicated to craft, and being surrounded by people eager to learn and create. It was evident that the rich traditions of quilt-making will continue to live an active and healthy existence. 

Let’s continue to keep those needles moving and creativity flowing!


Monday, March 16, 2026

A different approach to FMQ: mark making with thread

Earlier this month, I embarked on a weekend getaway to the Cumberland plateau for a free-motion quilting workshop with Memphis textile artist, Paula Kovarik. The workshop, At Play in the Garden of Stitch, was hosted by Shakerag Off Season

Responding to paint spatters on a drop cloth with free-motion quilting.

Free-motion quilting continuous lines. How many different lines can be made?

The workshop offered a refreshing shift in how I think about quilting. Instead of looking at the functional aspect of the quilting stitches—holding the three layers of a quilt together or creating background texture to support the patchwork composition—Paula’s approach to free-motion quilting was more like drawing and mark making. The sewing machine became a drawing tool to make lines, shapes, and colored fills, in addition to creating texture. 

Thread sketching in contrasting thread to create new focal points.

With that approach in mind, I now understand her preference for 40 wt, 3-ply thread. The thread has a more pronounced presence on the surface of the work. With a heavier thread, every line can hold its own. The stitches can read like sketched lines, and if the thread is of a contrasting color, it can shift the focus from the patchwork to the quilting. 

Quilting doodles with fills.

Since I rarely ever mark my quilt tops for quilting, Paula’s direction to respond intuitively to the fabric surface or previous stitched lines was a familiar and welcoming free-motion concept for me. A no-mark approach is something I have always loved about free-motion quilting! So it was easy to embrace the direction of this workshop. 

Quilting ideas for an existing piece

A valuable take-away that came out of this workshop was getting Paula’s feedback on a collaborative textile piece I started in another workshop last summer. Examining the piece through her lens of “thread as drawing” opened up new possibilities for how I might quilt it. We discussed ideas for how quilting lines could echo the circular format of the mandala composition—creating a subtle rhythm and supporting the radial layout of the piece. She also suggested to quilt over some of the appliqués—which would definitely make the quilting more manageable... and enjoyable for the quilter. 

Collaboration piece awaiting quilting.

The workshop was a playful weekend of experimentation and free-motion quilting. It was a reminder that quilting can be as much about mark making and exploration as it is about function and tradition.

The retreat facility

A view of the valley from the classroom.

The facility—where this workshop and an abstract painting workshop was held—is located on a tranquil, picturesque campus. Upon arrival, I was pleasantly surprised to meet up with several artist friends from past workshops—Michelle, who was my roommate for the weekend, Becky, Susan, Claire (our class assistant), Karen, and Paul. 

Friendships were renewed.


Sunday, February 8, 2026

Wanted: more Joy in the world

In these bleak, gray, cold, February days of winter, it seems the world could use some color and comfort to shift our collective mindset. Last week, I foraged time to finish three kitty quilts—all improvisationally pieced from scraps that were ready for a second life. Letting the scraps and color lead the way, the patchwork was built organically around blocks from fabric panels. 

Two scrappy kitty quilts with blocks from a fabric panel.

One quilt is going to a cat-loving friend and the other two are keeping our pack of outside cats snuggly in their cat boxes. The backing fabric is a cute bunny flannel print to make the quilts extra soft and cozy. 

Three blocks from a fabric panel make this scrappy quilt.
Finished quilt size: 27.75” x 24.25”.

All three quilts were free-motion quilted—a simple quiltmaking task that keeps me grounded and renews my mental energy. The bindings were also finished by machine. 

Scrappy binding made with seven different fabrics.
The flannel “bunny” backing fabric can be seen here.

I love the binding on this quilt that was made from scraps from seven different fabrics! Piecing together leftover bits for these quilts and the bindings—turning fabric scraps into something of value—is in keeping with a resilient spirit that is much needed today.

Scrappy kitty quilt. Improvisationally pieced and free-motion quilted.
Finished quilt size: 27.5” x 23”.

I recently read a blog post by a collage and mixed media artist, Lucie Duclos, that stated, “making something with your hands can help regulate your nervous system. It can be art, baking, knitting, stitching, whatever works for you.” 

Detail: quilt block from a fabric panel incorporated into an improv quilt.
Finished quilt size: 27” x 24.75”.

Making and finishing these scrappy quilts gives me a sense of calm and joy. I’m sending this calm and joy to the recipients as well.


Saturday, August 9, 2025

Free-motion Quilting Magic at the Folk School

The first weekend in August, the quilting studio at the John C. Campbell Folk School in Brasstown, NC was buzzing with creativity and the hum of sewing machines as ten enthusiastic students gathered for a weekend workshop in the art of free-motion quilting. This was my third time teaching this subject at the Folk School and each time was a fantastic experience.

The first evening we discussed basting the quilt sandwich,

On the first evening, we started with the fundamentals: discussing terminology, machine setup, needle and thread choices. Basting the quilt sandwich and a demonstration of the Kwik Klip tool is a reminder that a well-basted quilt is one of the keys to successful free-motion quilting.


Drawing motifs for muscle memory

The next day, the hands-on exercises commenced with drawing continuous line motifs in a sketchbook. If you can draw it—or doodle it—you can quilt it, right?

Gayle draws continuous line designs.

Cindy practicing FMQ shapes in her sketchbook.

I love that eveyone’s interpretation of a motif is slightly different and shows the personality of the quilter. Just like we all use the same 26 letters of the alphabet but each person’s handwriting is unique.

Ruth drawing in her sketchbook.

Leslie (below) was quite adept at the continuous line patterns that involved the lower case “e” and “l” shapes as those letters are prominent in her name. We all like to draw the shapes we are most familiar, and those are a great place to start for free-motion quilting!

Leslie drawing in her sketchbook.

After practicing the basic shapes, the sketchbook pages slowly began to be filled with unique combinations of motifs, reflecting each student’s personality. 

Combining different patterns to create something new.


From drawing to quilting

From the sketchbooks, we turned to quilting on fabric quilt sandwiches.

Melanie practices free-motion quilting.

Exploring free-motion possibilities with feed dogs disengaged, students strived to balance the speed of the sewing machine with the speed in which they guided the quilt sandwich under the needle.

Leslie (left) and Karen concentrate on moving the quilt sandwiches. 

Jan practicing her free-motion quilting.

There were a few wobbly lines and hesitant curves at first, which is entirely expected and part of the learning process. But with each quilted line, curve, and swirl, confidence began to emerge.

Marsha practices continuous line motifs.

Becky stops to load a new bobbin.

Students began to embrace curved and geometric continuous line designs, how to travel across the surface connecting one motif to the next, and the meditative rhythm that makes free-motion quilting another opportunity to incorporate design and pattern into a quilt top. 


Drawing, watching, doing 

The quilting studio is equipped with a camera and large screen TV that facilitates live demonstrations of me doing free-motion at the sewing machine. Several students said they liked just watching me quilt various motifs—feathers, spirals, pebbles, etc—and traveling from one motif to the next in order to fill the space across the quilt top.

Large screen TV facilitates quilting demonstrations.

The studios at the Folk School are open in the evening should students like to work. Several students continued to practice in the quilting studio, and one student brought a small lap quilt top that we got basted.

My studio assistant, Geri (left) and Brittney. Brittney’s lap quilt is on the table.

I brought two scrappy charity quilt tops to work on after hours. I got both of these “kitty quilt tops” quilted and they are ready for binding.

The quilting studio with the sewing machines humming.

Recap

On the last day of my free-motion workshops, I ask students for their take-aways and “light bulb” moments. This helps me fine tune the class or the supply list for future workshops. Here are their comments: 

  • I would have thrown the quilt at the wall after the first hour if I was trying to learn this on my own from a book. Having [an instructor] watching me, answering questions, and advising in real time was beneficial to my learning. 
  • I learned that free-motion quilting is not a technique. It’s an art form. 
  • Now I understand the process. And I have “names” for the different parts of this process. 
  • Seeing your work was inspiring and provided more ideas [for quilting designs] than the basic meander pattern I thought I would be learning. 
  • I realized I [the machine speed] had to go faster for the stitches to be consistent and the lines smooth.
  • Working on “bigger” motifs helped.
  • Many stated they realized the relationship between drawing in the sketchbook and working at the sewing machine. 
  • Several students said they liked just watching me quilt various motifs—feathers, spirals, pebbles, etc—and maneuvering the quilt to fill the space with the designs. 
  • Realizing that the quilting contributed to the design of the quilt, students wanted more discussion on choosing quilting patterns to complement the patchwork. They were interested in how to approach the machine quilting as a design element and not just a functional aspect.

Overall, students thought the pace of the class was good and there was a mix of different exercises, demonstrations, and the show and tell. I also got suggestions for future classes, and the possibility of a full week free-motion class.

Thanks for a great weekend!

Thank you to all the students who traveled the distance to the Folk School to spend the weekend with me in my Intro to Free-motion Quilting class! You were a fabulous group, asked great questions, and you all made excellent progress in just a weekend. Thanks again to my wonderful studio assistant, Geri, for all you do to document our experience—with camera and computer—and keep me on track.

Thank you to Geri, my wonderful assistant.

And thank you to the staff at the John C. Campbell Folk School for providing such a nurturing creative space. Can’t wait to do it again soon!

Our friend outside the weaving and quilting studios patiently awaits our return.

The googly-eyed rock outside the fiber arts studios.


Related Posts Plugin for WordPress, Blogger...