Showing posts with label fabric panels. Show all posts

Saturday, August 26, 2023

Expedite your quiltmaking tasks with quick methods, tools, and "convenience fabrics"

Three cuddle quilts completed in a week's time! Although these are smaller size quilts, the following tips can be applied to any quilt that you want to finish more quickly. 

Three finished cuddle quilts for charity.
Finished sizes (from left): 41.5" x 46", 29.5" x 35", 34.5" x 36.5"

Making the Quilt Tops

I used three different patchwork methods to create the tops for these quilts. 

  • Big fabric patches of varying size
  • A two-fabric block
  • A fabric panel with added borders

Basted Cuddle Quilts. A two-patch block design (left) and a big patch design (right).

The Big Patch design

The quilt top on the right is the easiest and quickest to assemble.

  • Pull a variety of fabric prints (these happened to all be from the same fabric collection).
  • The blocks/patches are the same height but varying width. Mine were 9.5" in height by anywhere from 5.5" to 10" wide.
  • Arrange the blocks/patches so the corners DO NOT meet.

Sew the blocks into rows. Then, when sewing the rows together, you won't have to worry about matching corners and nesting seam allowances because the patches are of different widths. It's an easy sew.

Two-patch blocks using various fabric prints and batiks.

Two-patch block design

The quilt top above is fun and scrappy. It started with a handful of rectangles that were about the same size—around 6.5"-7" by (about) 3".

  • Pair the rectangles and chain piece them (on the long side) into 2-patch units. Do this in one sitting, or keep a stack of rectangles near your sewing machine and use them as "leaders" and "enders" while sewing other projects. (I did a little of both.)
  • Pick the smallest pieced block and trim this one to make it square. Trim all the others to that size. Mine ended up at 6.5" square.
  • Arrange blocks in a "rail fence" layout. Sew the blocks into rows and then sew the rows together.
Spinning the seams in the two-patch quilt top.

Tip
: If the seam allowances of each row are pressed in an alternating fashion (toward the unpieced unit), the seam allowances will nest at the intersections when sewing the rows together. Spinning the seam allowances at the block intersections will minimize bulk, allow the top to lie flatter, and avoid any big lumps that would interfere with your machine quilting.

Cuddle Quilt using a fabric panel. 41.5" x 46"

Fabric panels—the "convenience fabric"

The peacock quilt was made using a fabric panel. How much easier can it get? It's like a microwave meal or a TV dinner... no fuss, no muss. Just add borders (or not!) and it's finished!

  • I added a 4" border to the sides and a 6" border to the top and bottom. The borders made a nice frame aound the 4 "faux" quilt blocks.
  • The border measurements were intentional. They kept the top within a 44/45" width to accomodate a single piece of fabric for the backing (no piecing the backing fabric—another time-saver).
  • The larger top and bottom borders made the quilt rectangular (rather than square).

Spray basting the quilts

As mentioned in this post, spray basting is a fast way to get the quilt sandwich ready for quilting. If you have a quilting buddy to help you, it's even faster!

  • Read the instructions on the can of spray baste. It tells how much, how far, etc.

  • Account for any overspray: cover the floor around the area, lay down an old sheet beneath the quilt back, or cover/protect the table with newspaper.

  • Spray baste in a well-ventilated space.

Quilting the quilts: Free-form and free-motion

Cuddle quilts and charity quilts are great for experimenting and practicing your free-motion quilting. The recipients of your endeavors will love the quilt and appreciate your kindness regardless of your skill level. And how do you get better at FMQ? With practice!

Load several bobbins before you start quilting.

Here are time-saving tips for machine quilting:

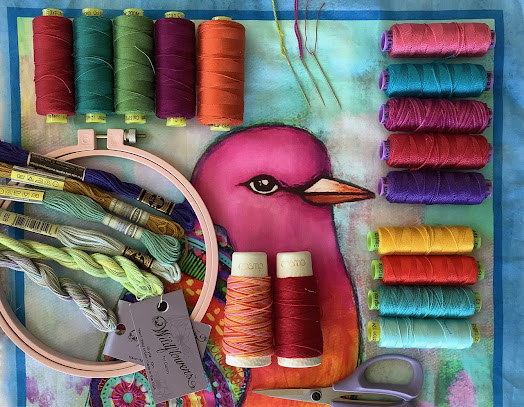
  • I used the same backing fabric for all three quilts. Choose a matching thread and load several bobbins before starting. If your backing fabrics are different, you could use a neutral/blending thread in the bobbin for all.

  • Load one extra bobbin for adding the binding by machine.

  • I don't mark the tops. Just drop the feed dogs, hit the pedal, and quilt intuitively!
  • Start quilting somewhere in the middle (on a "busy" fabric) and meander around, moving toward the edges of the quilt sandwich.

Large flowers were free-motion quilted on this Cuddle Quilt.

  • Be inspired by the fabrics to come up with a quilting design. The big-patch quilt (above) was free-motion quilted with large flower motifs. The feather-and-swirl design was inspired by the peacock tails (below).

Cuddle quilt made with a fabric panel.
Free-motion feather motifs mimic the peacock plumes.

  • Quilt with a larger motifs to cover the top in less time.

  • Combine one or more motifs such as the swirls and circles (below). Sometimes you need a different motif to fill weird spaces, to change the direction of your quilting path, or just make the quilting more interesting—for you (the quilter), and for the viewer.

Free-motion quilting with large swirls and circles.

Machine binding

Hands down, machine binding is much quicker than hand binding. 

  • I periodically cut 2.5" strips of left-over or stash fabrics to make bindings. Sometimes they are from a single print, sometimes they are scrappy bindings.
  • I use a piece of double-sided, water soluble sticky tape (made for sewing and quilting) to keep the miters in place when machine stitching the top. Or use a basting glue (like Roxanne's Glue Baste It).
  • You could use the water soluble tape or basting glue to secure the entire binding to make the sewing go quickly.

Machine binding on Cuddle Quilts.

Adding a special detail

Just because a quilt is made with time-savings techniques and tools, doesn't mean you can't add a personal detail to make it special. Here are some ideas:

  • A scrappy binding can be a fun detail and echo the variety of colors that are in the patchwork.

Switch out the top thread with a variegated thread to add a special detail to the free-motion quilting.

  • I used a variegated thread on the turquoise border on the peacock quilt. It doesn't show well in this photo, but the sparkles of the reds and oranges in this variegated thread add a surprising detail.

Here are additional photos of the quilting and the finished cuddle quilts.

Border and corner free-motion quilting.

Feathers and swirls on the peacock panel quilt.

Free-motion machine quilting (back view).

Finish quilt sizes:

  • Peacock panel quilt: 41.5" x 46"
  • Two-fabric block quilt: 29.5" x 35"
  • Big patch quilt: 34.5" x 36.5"

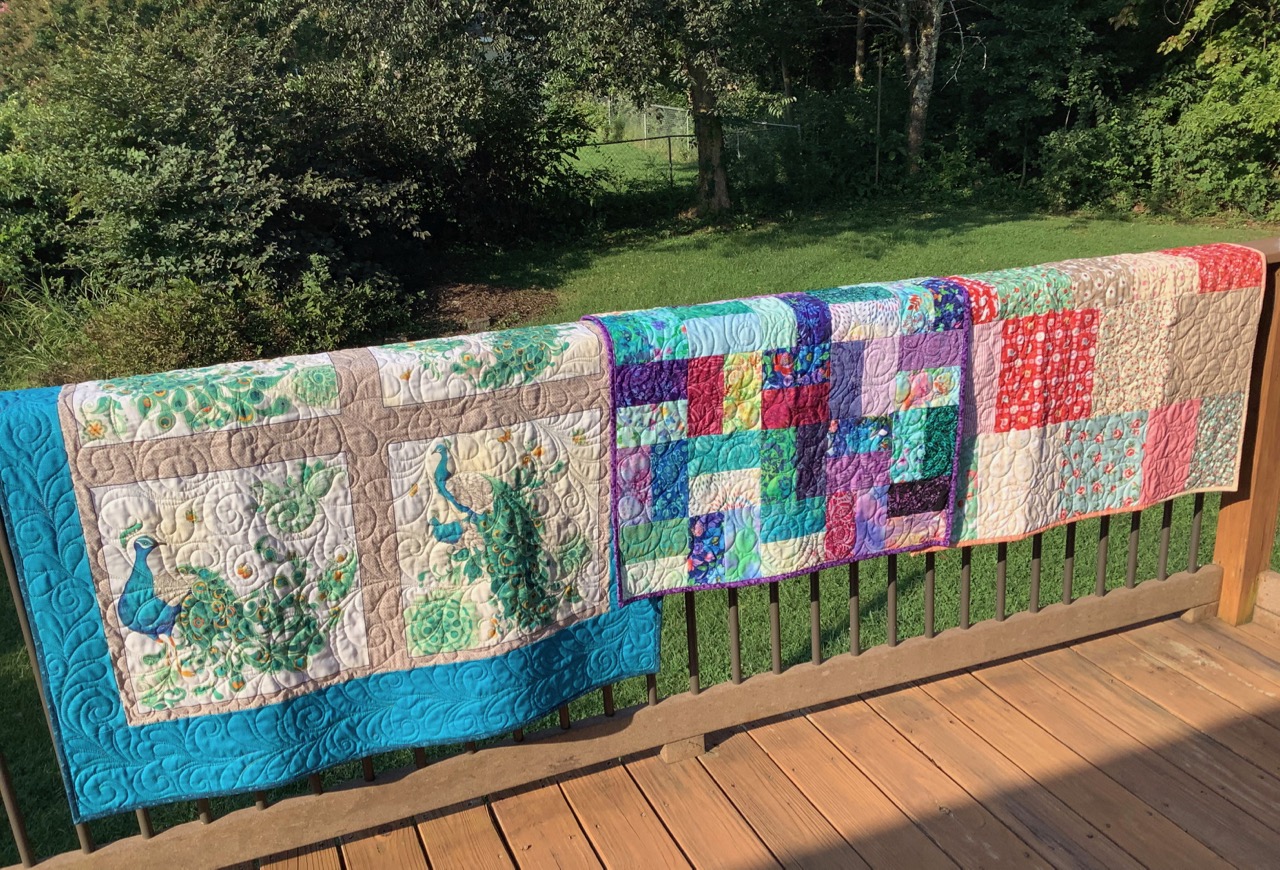
Three completed cuddle quilts.


Sunday, February 13, 2022

Slow stitching with fabric panels

What stitcher or quilter doesn't love all the wonderful colors and weights of threads available for both machine and hand sewing? I certainly do! Recently, I decided to take these threads and incorporate slow stitching into a beautiful bird fabric panel from Songbird Serenade by Robin Mead Designs for P&B Textiles.

Songbird Serenade by Robin Mead Designs for P&B Textiles.

Pull out an embroidery stitch dictionary 

It's time to pull out an embroidery stitch dictionary—in paper or digital format—and learn a new stitch or two. This 1963 edition of Needlework Stitches by Barbara Snook was a recent find at the Book Exchange of Foley.

Needlework Stitches by Barbara Snook, published in 1963.

Songbird Serenade has a 3-block panel, with each bird image approximately 13.5" x 17.5" (including the border). This bird's wing is a prime canvas for a sampler of hand embroidery stitches—seed stitch, blanket stitch, back stitches and others. Have a stitching embellishment party with your bird!

Various embroidery stitches embellish the wing of the bird.

Needles, threads and tools for hand stitching

As long as you have a hand sewing, crewel, sashiko or embroidery needle that accommodates the thread weight (thickness) and has a sharp point that will go easily through the cotton fabric panel, your thread choice is wide open. I'm also using an embroidery hoop for this project.

A sampling of threads and tools for slow stitching and hand embroidery.

As I have been an avid "collector" of machine and hand sewing and quilting threads for a number of years, I have a healthy thread supply from which to choose. A few favorites that I've used on my bird:

  • 5 wt. and 8 wt. perle cotton [Eleganza from WonderFil Specialty Threads]
  • 12 wt. cotton [Spagetti and Fruitti by WonderFil Specialty Threads]
  • 6-ply embroidery floss—using 3, 4 or 6 strands
Other options are cotton sashiko threads [Cosmo from Lecien], Ellana 12 wt. Merino wool/acrylic blend [WonderFil Threads], cotton floche, silk and silk blend threads or anything that catches your eye for enhancing your bird. 

Songbird Serenade projects

The Songbird Serenade collection will be available at your local quilt shop [YLQS] in April 2022. The 3-bird panel is accompanied by 11 colorful coordinating prints and an exclusive 108" wide backing designed specifically for this collection. 

Songbird Serenade panel from P&B Textiles.

What can you make with this fabric collection? Quilts, wall hangings, pillows, a tote bag, zipper pouch, a cover for your sketchbook, appliqué it to a jeans jacket, mount your embellished bird on foam core or wooden frame for wall art... are all creative possibilities. A quilt pattern will be available in April under the Songbird Serenade collection name at P&B Textiles.

Contact YLQS for needles, threads and Songbird Serenade fabrics from P&B Textiles. 

Songbird Serenade by Robin Mead for P&B Textiles.
Embellished with hand embroidery.

Keep stitching and serenade a fabric panel with colorful embroidery stitches!


Sunday, October 22, 2017

Creativity blossoms in Art Weave class at Sew 'n So quilt shop

When you ask students to introduce themselves in class and they share things like, "I like to make all styles of quilts...," "... I like to take classes to learn different techniques," and "... I like to step outside the box," you know you have a classroom full of adventurous quiltmakers and it's going to be a fabulously creative class! My Art Weave class yesterday was exactly this!
"Art Weave" class at Sew 'n So Quilt Shop, Rocky Face, Georgia.

Preparing the strips for weaving
and an assortment of fabric panels with other designs.
Yesterday, I taught the Art Weave technique at Sew 'n So Quilt Shop to an eager group of quiltmakers. It was a joy to be back in the classroom again. All the students created beautiful pieces of fabric art with large scale floral designs from Frond Design Studios.

It was a special, serendipitous treat for me when I realized that each student had chosen a different flower design for their art weave piece. This also offered class attendees a bouquet of possibilities for what they could do for the next project. The classroom was abloom with colorful fabric art possibilities!

One of the missions that artist-owner, Stephanie Brandenburg, has for her fabric company, Frond Design Studios, is "Art into the every day." Frond's large scale fabric prints and the art weave technique is an ideal approach for introducing this concept to people of all skill levels.


Courtney works with the Love Blossoms Lily.
Stephanie also thinks of the company's fabric collections as the initial leg of a creative relay race. From the original paintings on canvas and the printing of the fabrics, to the merchandising, displays and class projects offered at quilt shops and independent sewing centers, to the creative hands of quilters and sewers, the baton is passed from maker to maker at each leg of a creative journey.
Sherry (left) works with the Una's Garden blue iris and
Jo-Anne (right) chose the Love Blossoms red poppy.
On their leg of the journey, class attendees put their individual stamp on their piece said they enjoyed the art weave technique. Here is a glimpse of their work.
Art Weave Lily by Courtney.
We discussed a variety of options for quilting and finishing and everyone chimed in with ideas for other projects using these large scale prints and fabric panels. Thank you to all my students for coming to class with a sense of adventure and to Anna at Sew 'n So for hosting the class.
Art Weave Poppy by Jo-Anne.
This is the violets panel from Una's Garden in one of my class samples.
My class sample, Violet Bouquet, using the Art Weave technique.

Inspired? Follow my blog and watch my class calendar to see where I will be teaching this class in the future. Quilt shops and quilt guilds can contact me if interested in scheduling a class.

Looking for these fabrics? As of this blog post, Sew 'n So Quilt Shop has the full collection of the Flower Power fabric panels from Frond Design Studios. Several additional panels went home with the class attendees, so don't delay if you want some for your own quilting or sewing projects.
      If you are a shop owner and would like to stock these fabrics in your store, email me at fabricrepveronica (at) gmail (dot) com.

Sunday, July 9, 2017

Getting ready for a "Group Baste" session

Cuddle quilt top pressed and ready for basting.
My quilt guild, the Choo Choo Quilters, does a "group baste" at our annual Cuddle Quilt workshop. This is so efficient and fast—ya gotta love it!

1. We boost the tables up on wooden blocks to a height more conducive to standing (without having to bend). 2. Two people—on opposite sides of the table—tape the backing down. 3. The batting is positioned. 4. We use a spray baste product (follow the instructions on the can). 5. Then two people lay the pieced quilt top over the sprayed batting. Smooth the top to adhere. DONE! Basted.

We crank these basted cuddle quilts (child size and lap size) out like an assembly line that Mr. Ford would be proud of.

So, with our Cuddle Quilt workshop coming next month, it behooves one to get as many quilt tops ready for this process as possible. Hey, who wouldn't want a speedy solution for this [booooring, but necessary] step in the quiltmaking process??? I have three tops ready for the Group Baste session.

I finally found time to assemble a batch of strippy blocks from last year's Cuddle Quilt workshop (or was it two years ago?).
Strip pieced quilt top. 32" x 40"
This next one is an improv "Make Do" quilt top using scraps and leftover patchwork. (I've been making improv chunks since the February guild program.)
Improv cuddle quilt. 41" x 30"
Panels are good for these quilts, too. (This one is a more recent finish, but you can see it required little cutting and sewing.)
Fabric panel with borders. 33" x 42"
So... I'm making progress... a few found minutes at a time... over the course of the year. 

Kudos to the other members of the Choo Choo Quilters... who have just as little spare time, but always come through making these quilts for our guild's community service project. A true team effort!

Saturday, September 3, 2016

Paris Rendezvous—quilting a fabric panel

Have you ever quilted a fabric panel? There are NO seam allowances to deal with, so the playing field—or rather the quilt top—is wide open for any kind of free-motion quilting, ruler work, thread painting or embellishment. I purchased this Eiffel Tower/Paris fabric panel by Timeless Treasures from Huntsville Sew and Vac with special embellishing in mind. To begin, it needs to be quilted.
Pin basting the Paris fabric panel. 
The chosen backing fabric is a tonal 108" wide backing. It looks woven, but it is a print. The beige color coordinated with the color palette of the Paris scene in the panel.

The tower was outline quilted first. See how the quilting shows on the neutral colored backing? That's what a light colored backing fabric with a subtle print will do—the quilting will show.
Eiffel Tower outline quilted (back view).
A few of the pink roses and leaves were also outline quilted. This provided definition to the flowers and gave the scene a sense of a foreground and background. The word "Paris" was outline quilted as well. The background fillers consisted of a concentric swirl motif with occasional pebble quilting to fill in the smaller spaces.
Free-motion quilting on "Paris Rendezvous."
Back view of free-motion quilting.
Here is the Paris panel sunlit by the morning sun. A forest green blender for the binding frames the composition.
Sunlit free-motion quilting on "Paris Rendezvous."
Many of my readers and ask about the threads I use in my free-motion quilting, so here are the thread and quilting stats.

Quilt stats:
Top thread: 50 wt. cotton; color: Tutti 36 (WonderFil Threads)
Bobbin: Bottom Line 60 wt. polyester; color 650 champagne (Superior Thread)
10 hours of free-motion quilting; 3 bobbins

The next stage is the embellishment that will highlight the Tower and surrounding roses. Stay tuned.

Friday, March 6, 2015

Hand bookmaking with fabric:
Binding and finishing the Farm Friends book

Are you ready for the binding and finishing of the Farm Friends soft book? The earlier production steps can be found in this post.

Binding and Finishing
Now that the signatures for the Farm Friends soft book are complete, they need to be gathered and collated in preparation for the binding. 
Two 4-page signatures and book cover of "Farm Friends" soft book.
Stack the signatures on top of the inside front/back covers. Check to make sure the pages are sequential (reader spreads) before you commit to the sewing.

Binding the book: Saddle Binding
In printing terms, "stitching" refers to the use of wire staples to secure the signatures of a book. When bookbinding thread is used to bind a book, it is called "sewing," or Smyth sewing. In quilting and sewing, the terms "stitching" and "sewing" mean much the same thing.

Take the prepared stack of signatures and pin or hand baste them in place in preparation for the saddle binding. The term "saddle binding" comes from the equipment that is used in book production. The signatures straddle a device similar to sitting on a saddle. For the fabric book, the signatures are laid out flat and sewn through the center of the pages, in the gutter. A saddle binding (as opposed to a side binding) allows a book to open flat.
Pin the signatures in preparation for bookbinding.
Binding by machine or by hand
If binding your soft book by machine, it's a good idea to use your machine's walking foot or an even-feed foot. If you enjoy hand sewing, this is a great opportunity for a bit of hand work—which is what I did on my book. I decided to try out a new 12 wt. thread I got in a Sulky Petites thread sampler pack. I used a backstitch.
Saddle binding the soft book by machine (left) or by hand (right).
Once the saddle binding is done, your soft book is complete. I particularly liked the fact that the book's cover is slightly larger than the text pages (a nice detail!). This protects the inside pages (one job of the cover), keeps them from peeking out when the book is closed and makes for a nice tidy presentation.
The cover extends beyond the inside pages of the book.
Be sure to fill out the bookplate on the back cover with your Ex Libris.
Farm Friends bookplate.
Creative Bookmaking and Embellishing
A soft book like this one can be sewn and assembled in an hour or two for the quilter or sewer with some experience. It is also a wonderful beginner sewing project. You might also consider these creative techniques for embellishing, enhancing or "illuminating" the pages of a soft book panel:
  • thread painting the farm animals or background scenes
  • embroidery and hand stitched embellishments
  • free-motion quilting
  • top stitching or edge stitching the pages—metallic threads could simulate gilding
  • the small format is ideal to experiment with surface design techniques.
Got ideas? Leave me a comment! The creative possibilities for quilters, sewers and fabric book artists are boundless (pun intended?).

With a couple hours invested in the bookmaking, this soft book will also provide hours of reading enjoyment for you and a youngster. What better gift is there than to give a book... or to read and re-read it aloud to a child... or listen to a new young reader read it aloud to you?

----------
Bookbinding tools for making Soft Books
In addition to my sewing machine, these are the tools I used for my soft book production. The bone folder has a blunt tip and rounded edges and can be used for folding and scoring paper as well as a point turner for soft books. The other tools are basic sewing tools.
Bookmaking tools: appliqué scissors, bone folder, point turner,
threads for machine or hand binding.
A note of Thanks and Gratitude to the professors in my undergraduate (NIU) and graduate (RIT) schools who instilled the love of typography, printing and bookmaking in me and fellow classmates: John Henry, Archie Provan, Jim Mannino, Emery Schneider, Werner Rebsamen, Joe Brown, Dr. Julius Silver, Joe Noga, David Pankow and also to Frank Ramano.

Here is the print production video from this post.


Wednesday, March 4, 2015

Hand bookmaking with fabric:
The Farm Friends book, part 1

"Farm Friends" soft book.
Typography, page design, book and print production—these are a few of my printing and publishing "loves." I've had a rewarding career in the printing industry and now that I work in the textile industry, making this sweet little project—a fabric book—brought back wonderful memories for me and blended loves from both my careers.

This fabric book, or "soft book," is from a fabric panel that is usually 36". You can find a variety of these soft book panels at your local quilt shop [YLQS].

I'll take you through the fabric book production steps and equate them to the print-on-paper bookmaking process as well. Because print production terms are ingrained in my brain, I'll provide links to their definitions to help clarify. Here goes…

The Press Sheet / The Fabric Panel
The press sheet [fabric panel] is comprised of all the 2-page spreads that make up the book before it is assembled.
24" fabric panel for the "Farm Friends" soft book.
This book is a self cover book, meaning the cover is printed on the same stock/paper as the text pages. You can see the front and back cover spreads, the inside front cover and the inside back cover, and all the book's inside pages on the panel.
This is a self cover book.
Shown here are the outside and inside front and back covers.
Since the book is already paginated, you don't have to worry about page imposition and the story reading incorrectly. 

Two-sided Printing
With ink-on-paper, when a press sheet is automatically printed on both sides with a single pass through the printing press, it is called "perfecting." This term is commonly used with offset lithography. With a digital printer, it is called "duplexing." With the fabric book, the single-sided spreads have to be trimmed out and manually stitched together back-to-back to simulate two-sided (duplex) printing.
Cut out the fabric page spreads. 
This is not difficult. Instructions and diagrams are found on the fabric panel. The instructions indicate which spreads back up each other...
Book assembly instructions are printed on the fabric panel.
The diagram shows the pagination.
…and the corresponding folios (page numbers) are found on the pages. This makes it easy… however...
Page numbers are printed on the pages.

A Note on Bookmaking Conventions
… It was slightly disconcerting for someone with a publishing background to find that this book did not follow the page numbering convention. For English texts (texts read from left to right), the odd numbers should appear on the right-hand (recto) pages and the even numbers on the left-hand (verso) pages. 

But back to the soft book production…

Duplexing
Got long lengths of batting trimmings? Here is where they come in handy.
Batting trimmings were used for this fabric book.
Take the corresponding page spreads and sandwich them together with a piece of batting. I used long scraps of low-loft 100% cotton batting—trimmings from larger quilts. Pin and sew around the outside of the sandwich, leaving an opening for turning. I did a little back stitching on either side of the opening for strength.
Sandwich, pin and stitch the book spreads.
The corners and batting were trimmed close to the stitching to reduce bulk.
Trim corners and batting to reduce bulk.
Before turning, press open the seam allowances on the side with the opening. This will provide a straight crisp edge for finishing. Turn the piece right side out through the opening. Use a point turner or bone folder at the corners. Press.
Press open the seam allowances before turning right side out.
Here are the completed 4-page signatures and the cover. Binding and finishing will be covered in Friday's post. Stay tuned...
Two 4-page signatures and book cover.
Related Posts Plugin for WordPress, Blogger...